Note: In the recent Go GST Bill update, the option to add custom columns has been moved from the Settings page to the document creation page for easier access and convenience.
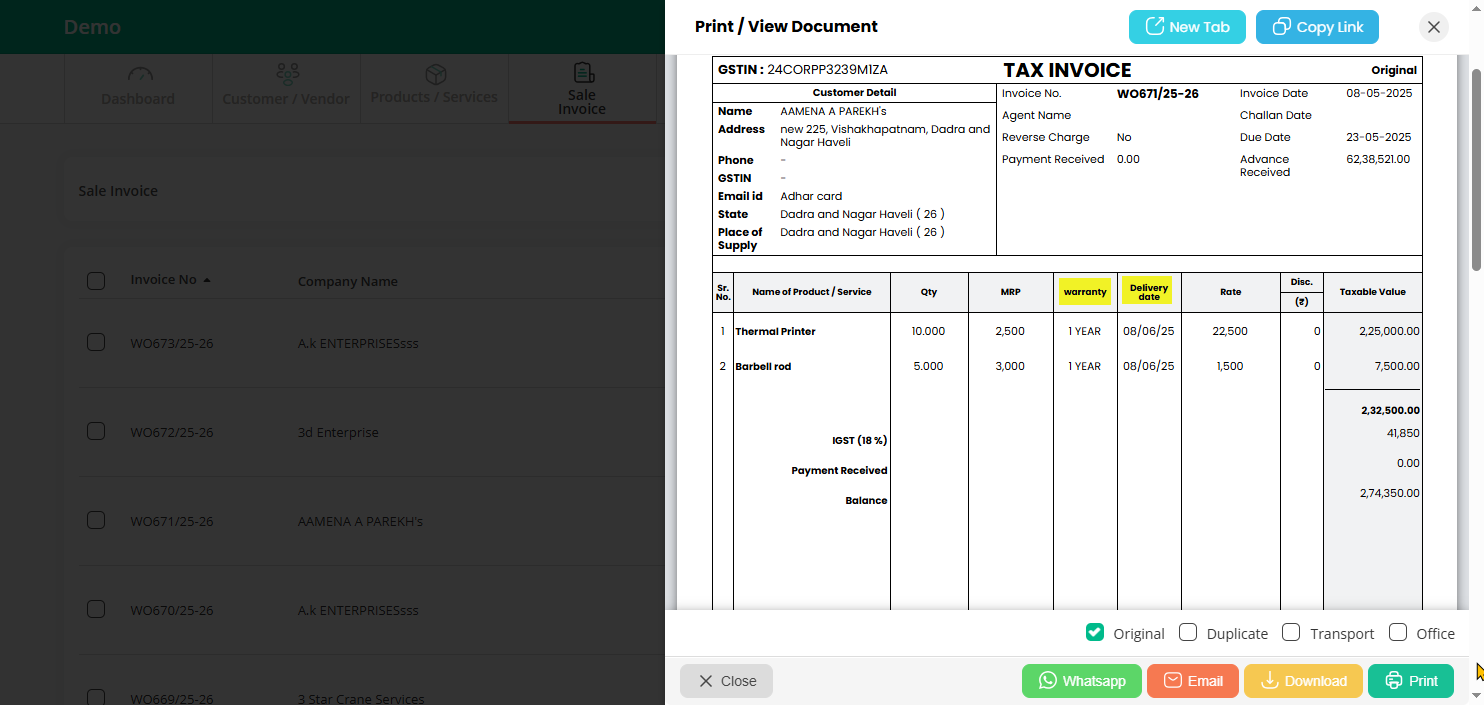
You can now add custom columns like “Warranty” and “Delivery Date” directly while creating your invoice.
Here’s how to use Custom Columns :
Step 1: On your Dashboard, click on the Sales Invoice option and then click the “Add New” button from the top-right corner.

Step 2: Now scroll down and find the “Custom columns” section on the right side, under the Product Items area.
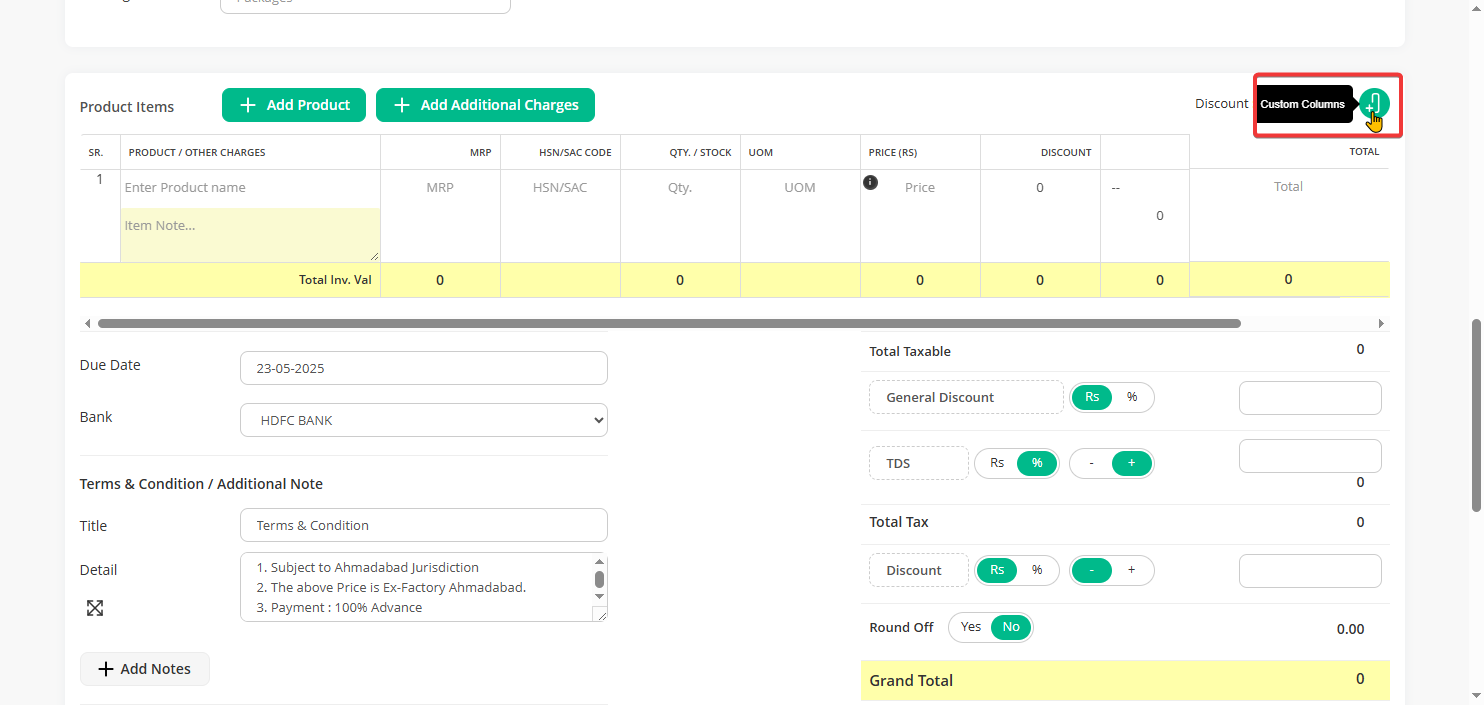
Step 3: Enter the name for each field under “Custom columns” and choose its display position.
Once you make the changes, simply “Save” it.

Step 4: Now, when you create a new Sales Invoice, you’ll see the new custom column for “Warranty” and “Delivery Date.”

Step 5: These fields will appear in your invoice.