✅ Here’s how you can create a Purchase Order:
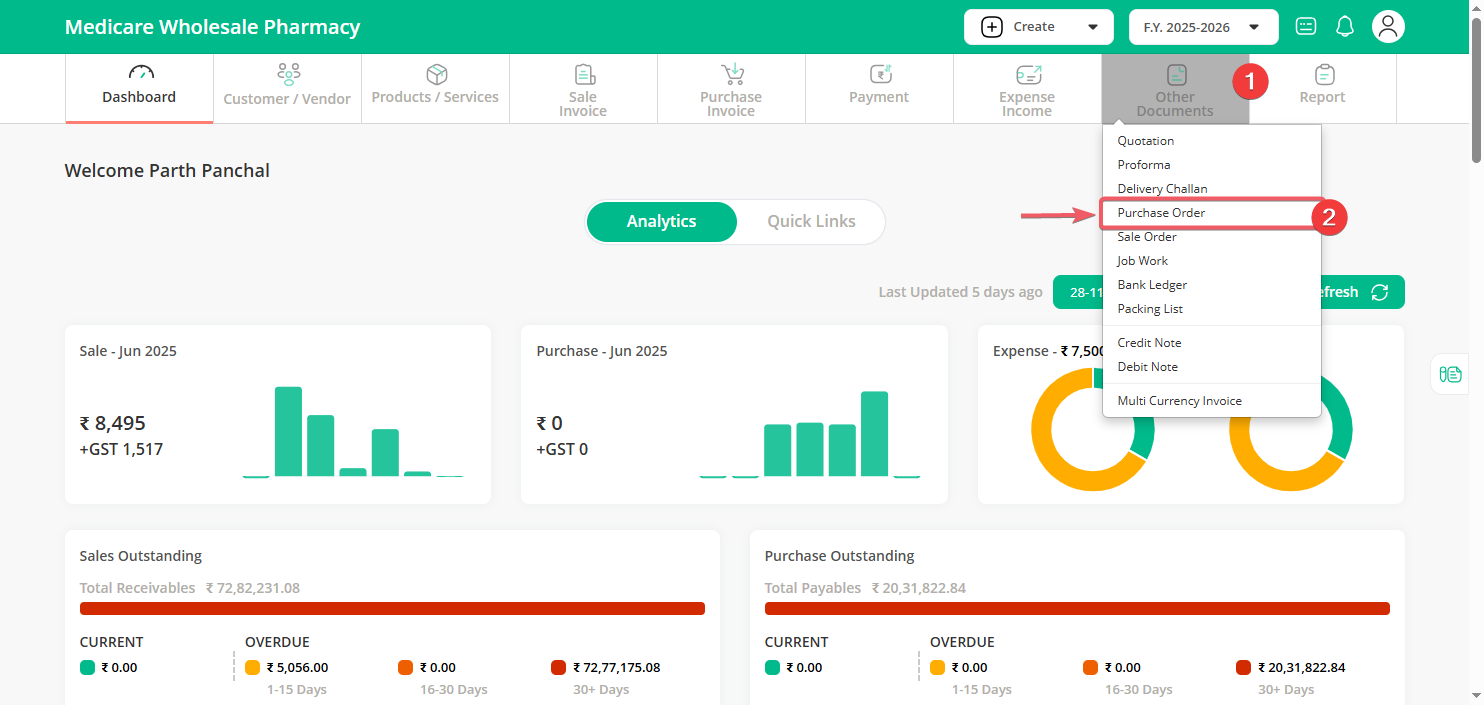
Step 1: Click on the Other Documents menu in your dashboard, then select the Purchase Order option from the sub-menu.
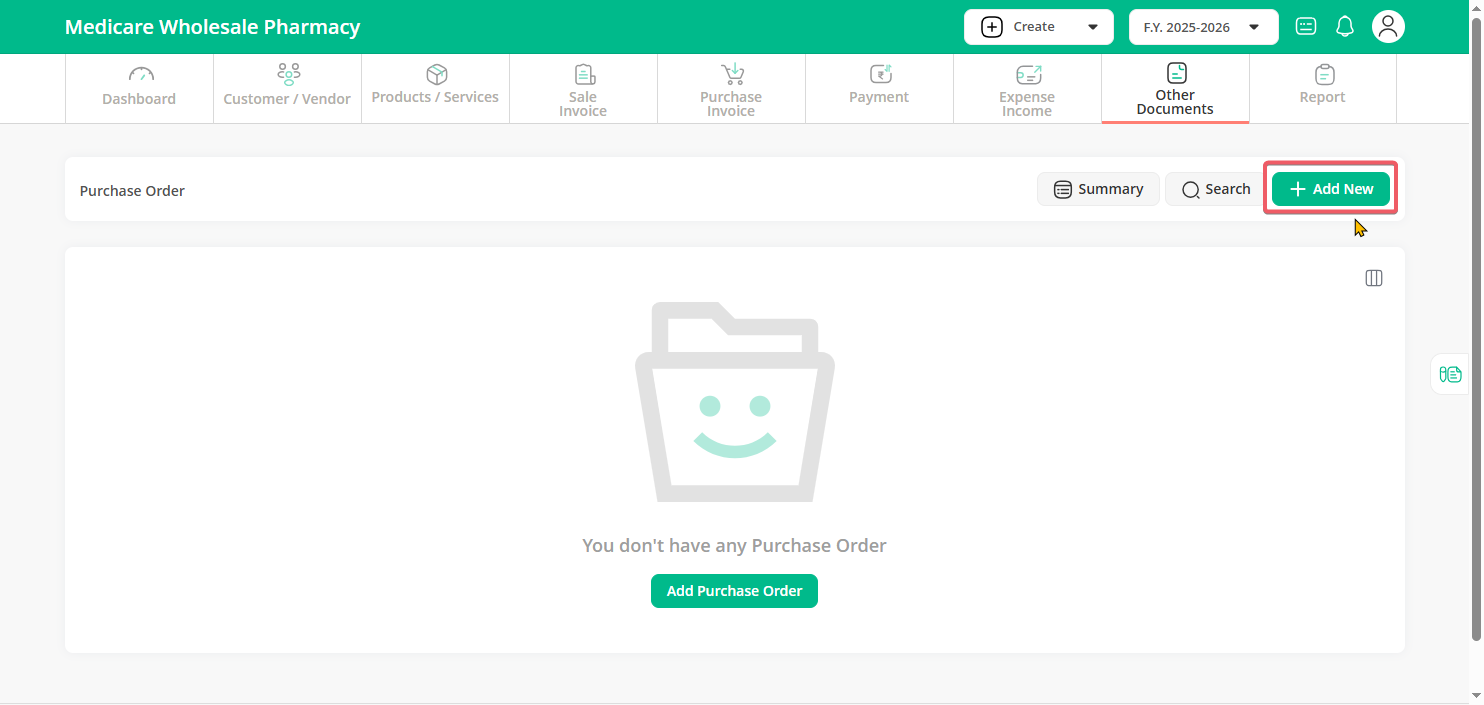
Step 2: On the Purchase Order page, click the Add New button to start creating a new order.
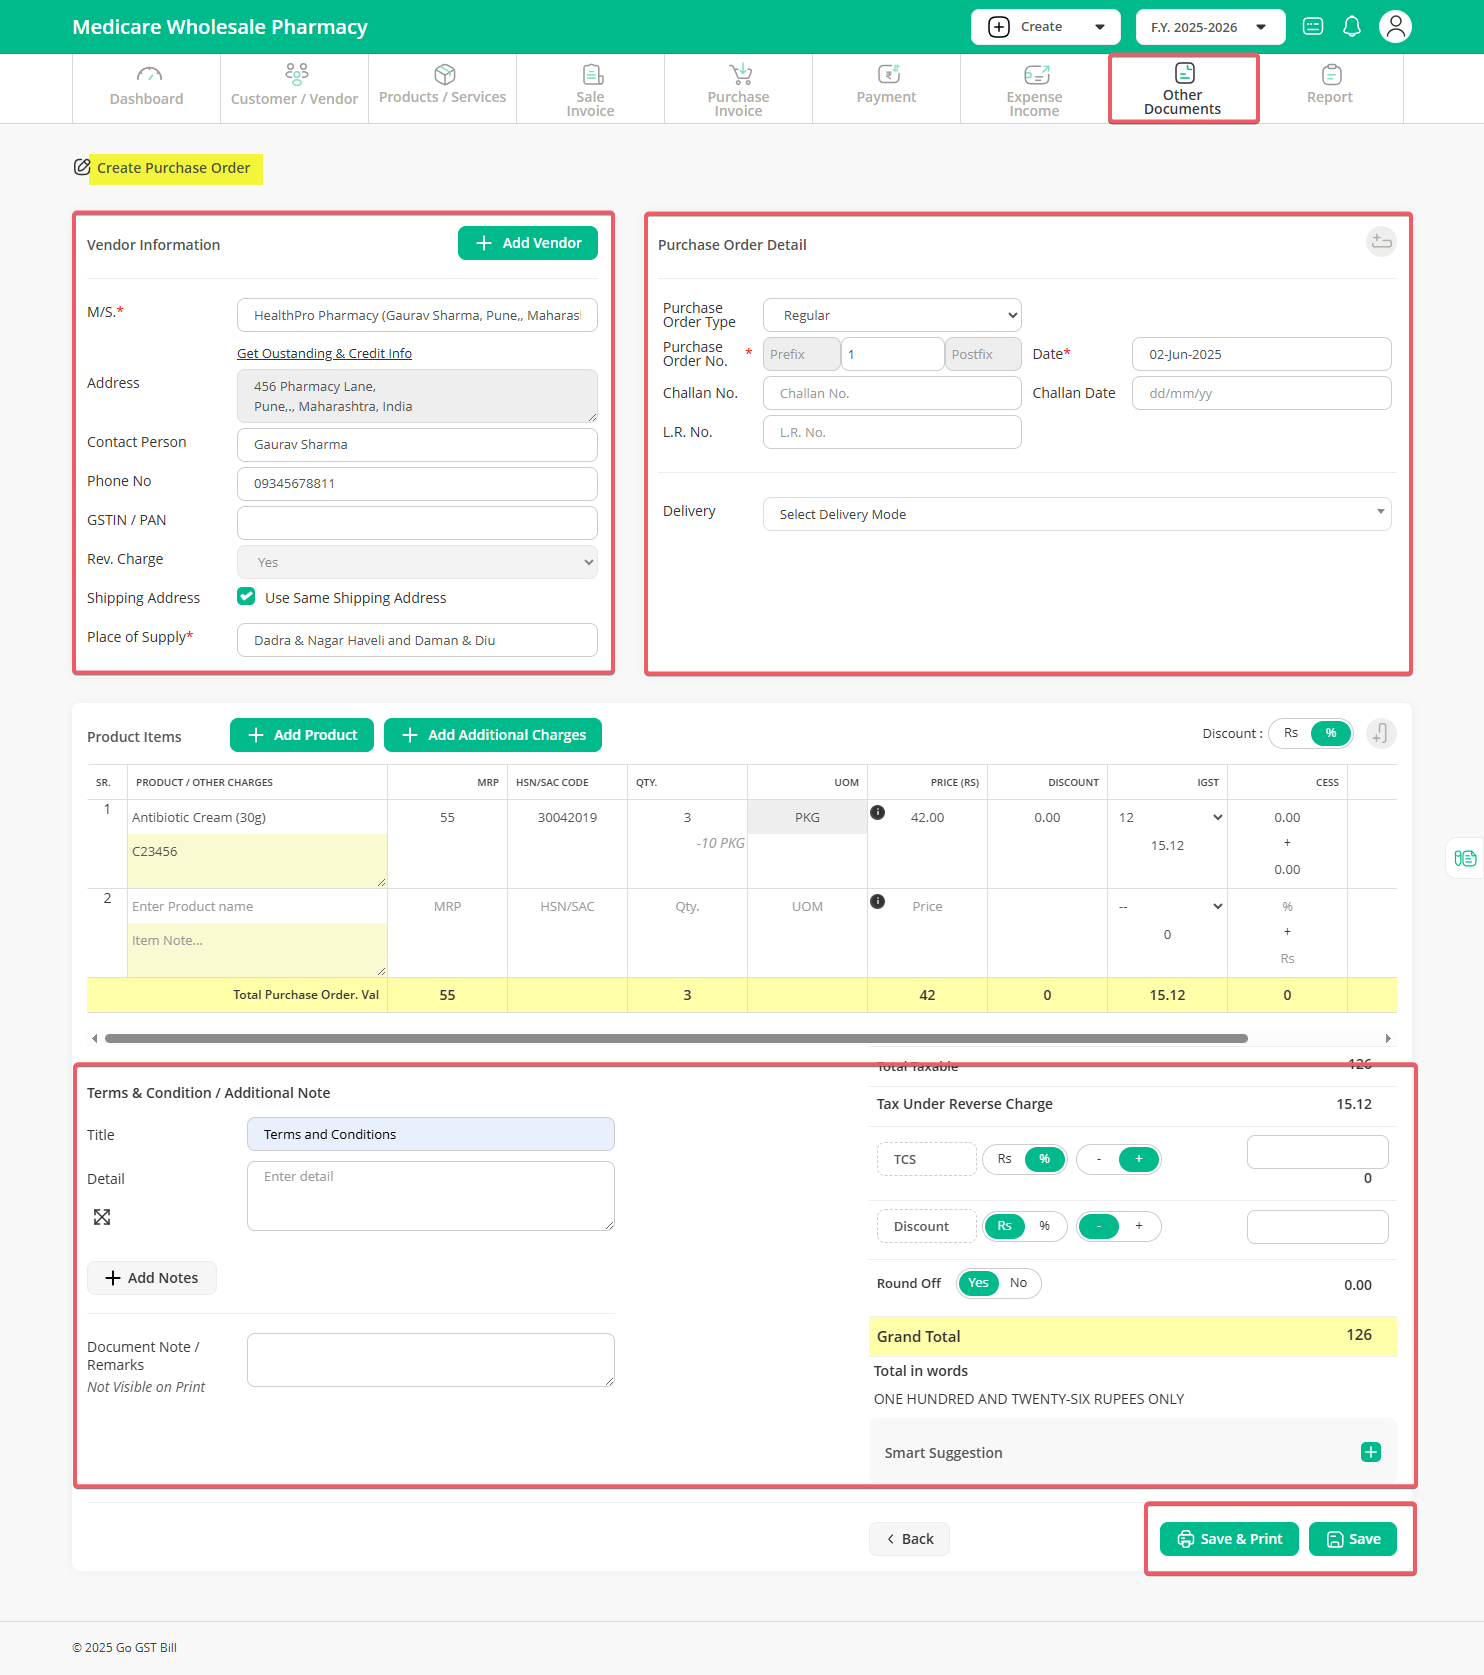
Step 3: Fill in the key details — select the customer, add invoice info, and enter the product details like name, quantity, and price.
✅ Once done, your purchase order is ready to save!
Section 1: Customer Information Section:
– Select customer from the list or if you do not have that customer click on Add Customer button to add new customer
Section 2: Invoice Detail Section:
– Select Invoice Type : Regular, Bill of Supply, Export
– Invoice No. & Date will be auto selected but if needed you can change it
– Enter other information like Challan No, Challan Date, E-Way No (These fields are customizable from the settings)
Section 3: Product Items
– Select the Product from the list or if you have not added your product click on “Add Product” button to add a new product
– Other details like HSN, QTY, UOM, Price, GST will be auto-filled based on what you have entered when creating a product. If needed you can edit it or add if it’s blank.
(Enter Price and select GST if your selling price is excluding, Or if your price is including then select GST and enter Total amount it will auto calculate Price)
– Select all the products that you want to add to the purchase order
(You can use “-” button to remove any product, and use “+” button if you want to add a new item in between already added items)
Note: You can change the Discount in Rs or % from the discount toggle button
Note: If you want to add extra changes like Packaging, Transport you can add that by clicking on “Add Additional Charges” and then you have to add those charges in the invoice, the same way as you added items
Section 4:
– It will use default Terms & Conditions, if needed you can change it for this specific invoice or you can also change default Terms & Conditions from the settings option
– If you want to add any extra notes like Warranty you can add that by clicking the “Add Notes” button
Section 5:
– You can add TCS or discount if needed
Note: Both fields are customizable, you can change their label and function if you want to add that amount to the total amount or subtract from the total amount
Example: you can change the Discount name to Subsidy and click the “-” button and “%” button so it will subtract the entered % from the total amount.
– Set Round off to Yes or No as per your need
Step 6 : You can add any remark in the Document note section (it’s for internal use and will not be printed in the invoice)
Example: Like who created this invoice or reason if you have given a special price or discount
Step 7 : Click on the “Save Button”