Price List helps you offer different discounts to different customers based on your business needs.
For example, you may have two types of customers:
- Retailers → 10% discount
- Wholesalers → 30% discount
Using the Price List feature, you can easily create such rules and apply them automatically while creating invoices.
In Go GST Bill, you can create different types of price lists:
1) All Customers
– All Products
– Product Group
– Individual Product
2) Customer Group
– All Products
– Product Group
– Individual Product
3) Individual Customer
– All Products
– Product Group
– Individual Product
Example Scenario:
In this guide, we will create a price list to give different discounts to a wholesaler and a retailer for a product “Laundry Detergent”.
Shiv Trader (Wholesaler) – 30% discount
Ravi General Store (Retailer) – 10% discount
Initial Setup
1: Create two customer groups:
– Wholesaler
– Retailer
2: Create Customers
Create customer Shiv Trader and assign it to the Wholesaler group
Create customer Ravi General Store and assign it to the Retailer group
3: Add Product
Create a product Laundry Detergent
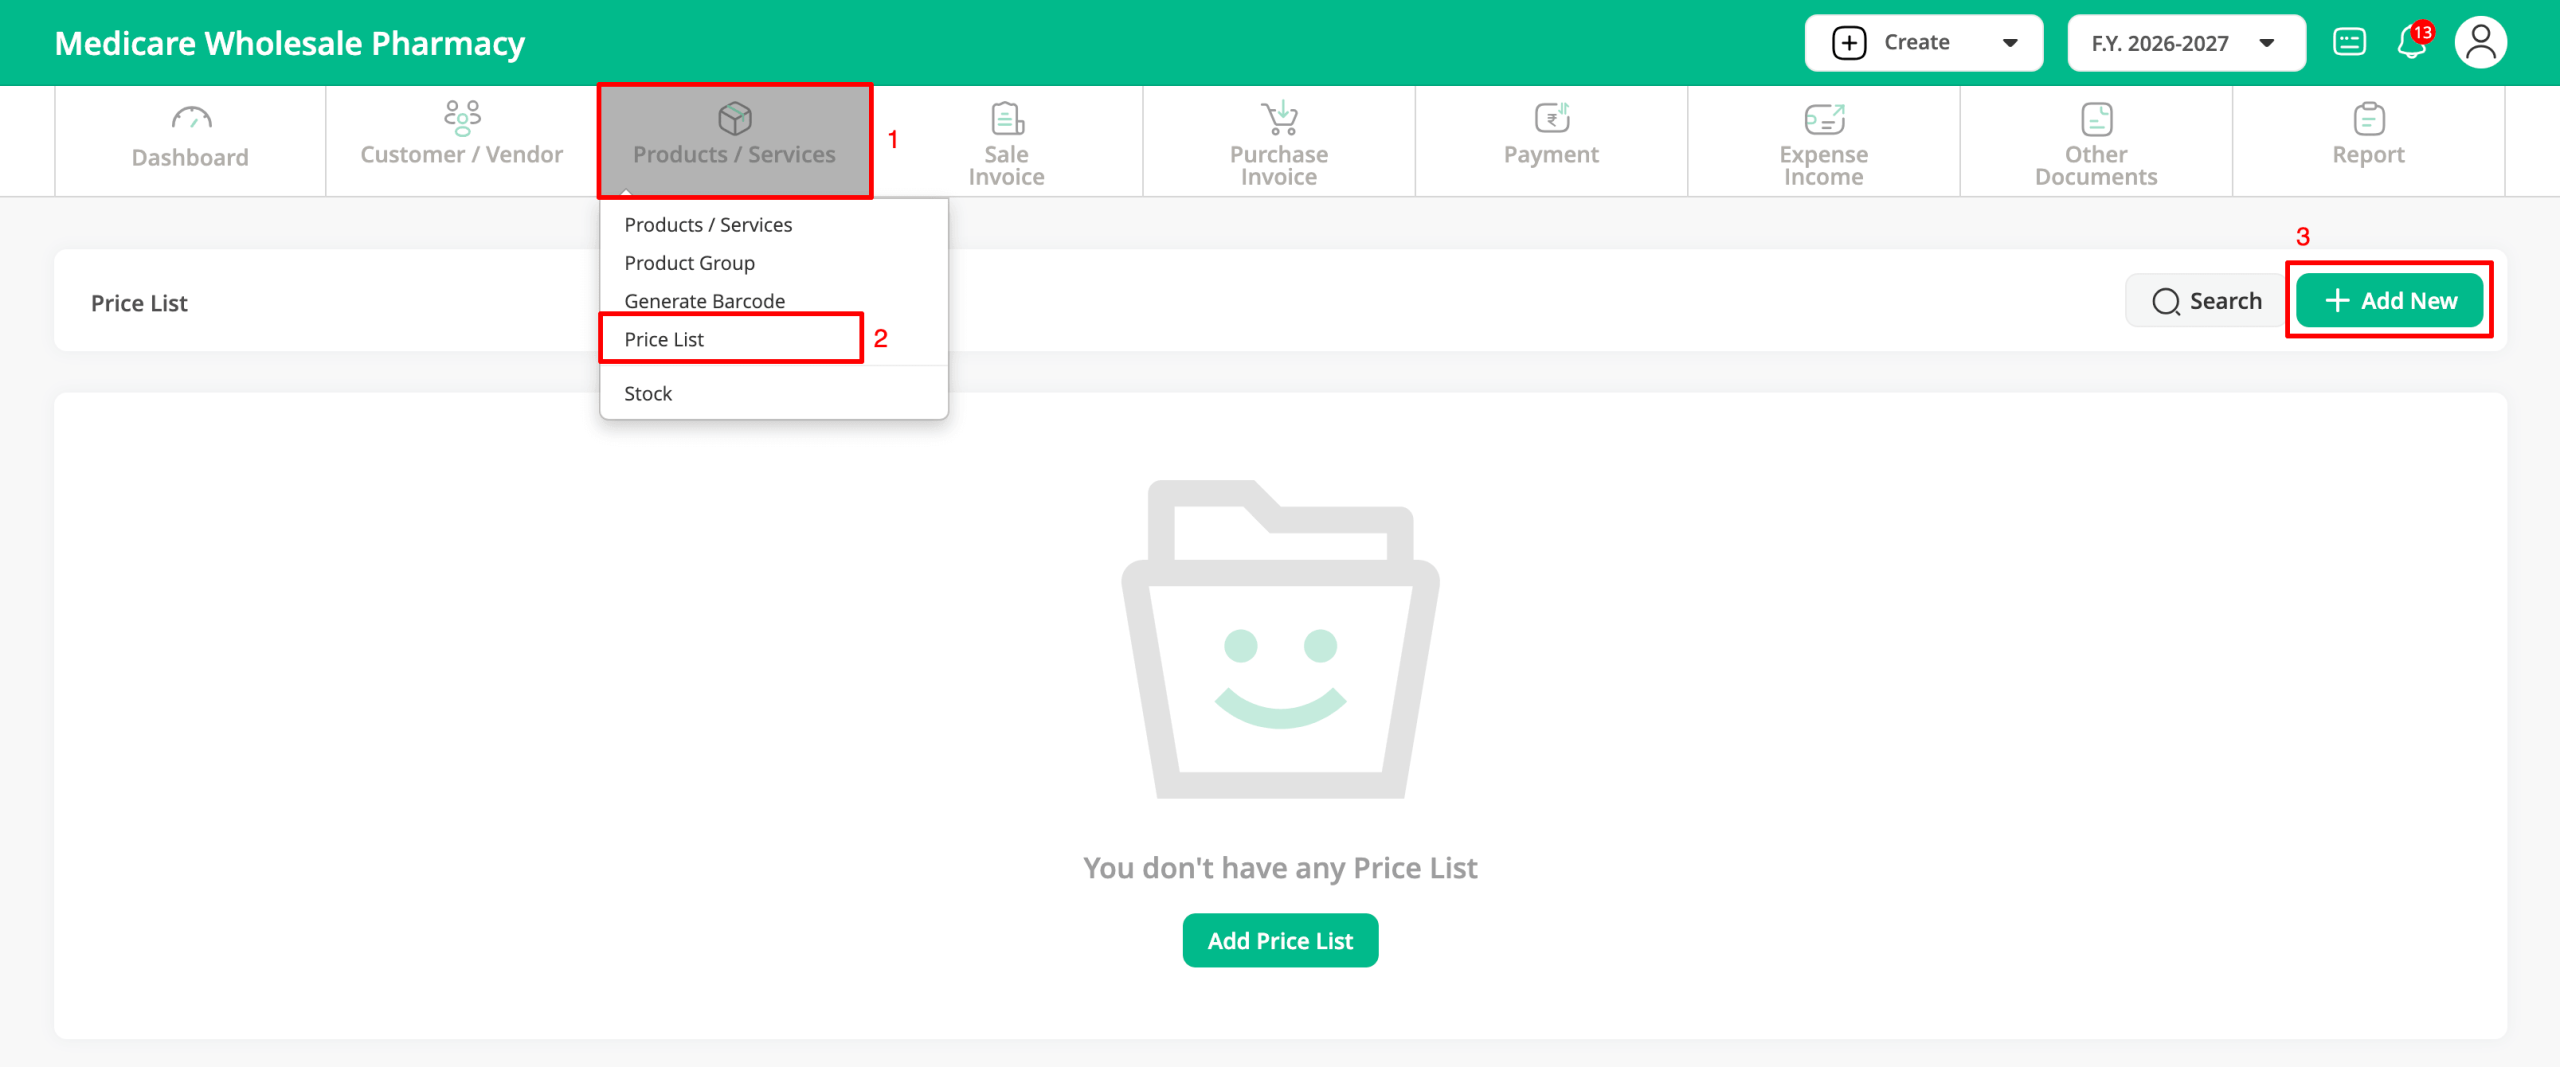
Step 1: Select “Product / Service”, then choose “Price List” from the submenu.
Click on the “Add New” button on the Price List page to create a new price list.
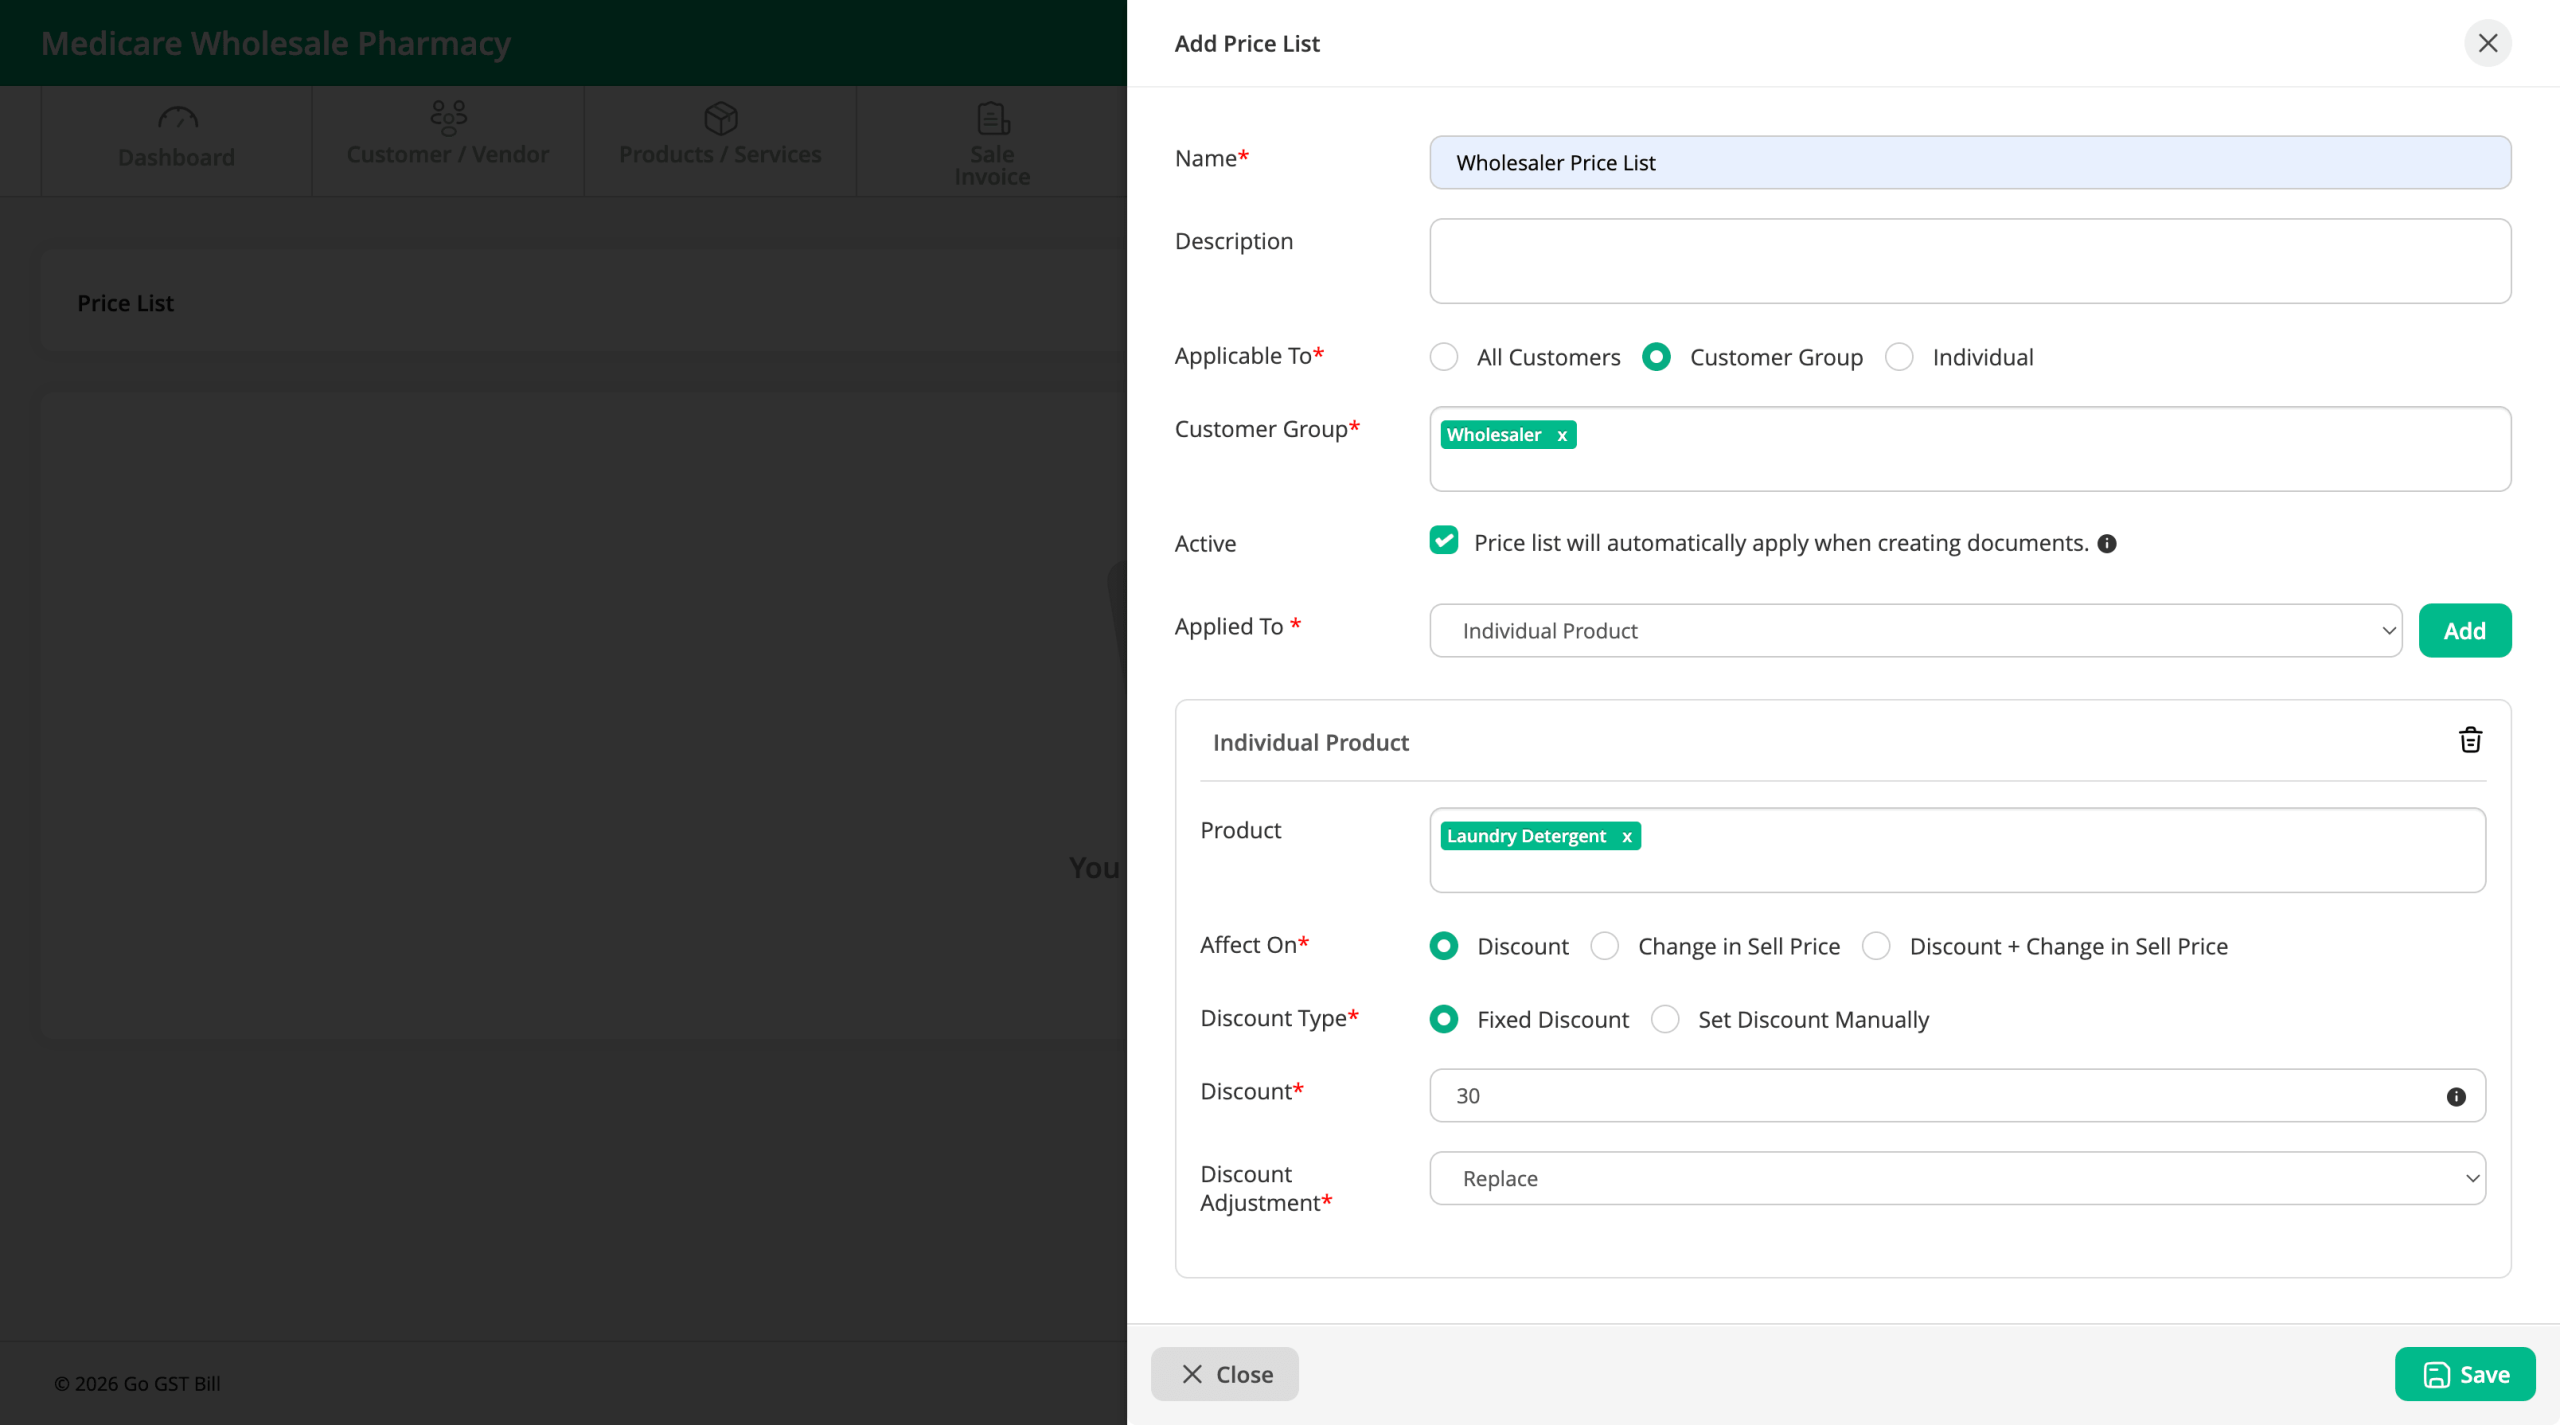
Step 2: Create a price list for Wholesale customers as per the shown configuration.
Name: Enter any name for your price list.
Applicable To: Select which customers this price list will apply to.
- We have selected the customer group, as we want to apply this price list only to Wholesale customers.
Applied To: Select which products this price list will apply to.
- You can choose All Products, Product Group, or Individual Product.
- We have selected Individual Product and clicked on the Add button.
Now, you will see a new section to select that individual product.
Product: Select the product.
- We have selected Laundry Detergent.
Affect On: This option allows you to choose whether you want to apply a discount, change the selling price, or do both.
- We have selected Discount.
Discount Type: This option allows you to choose whether you want to apply a fixed discount to all products or specify different discounts for different products.
- This is useful when you have selected multiple products and want to assign different discounts to each.
Discount: Enter the discount value.
- The unit (% or ₹) will be automatically selected as per the product settings.
Discount Adjustment: This option allows you to choose how the discount will be calculated, such as Replace or Add-on.
- If you select Add-on, it will add this discount to the discount specified in the product settings.
- Example: If the product already has a 5% discount and you add 30%, the total discount will be 35%.
- If you select Replace, it will ignore the product’s existing discount and apply only the discount specified in the price list.
Click on the Save button.
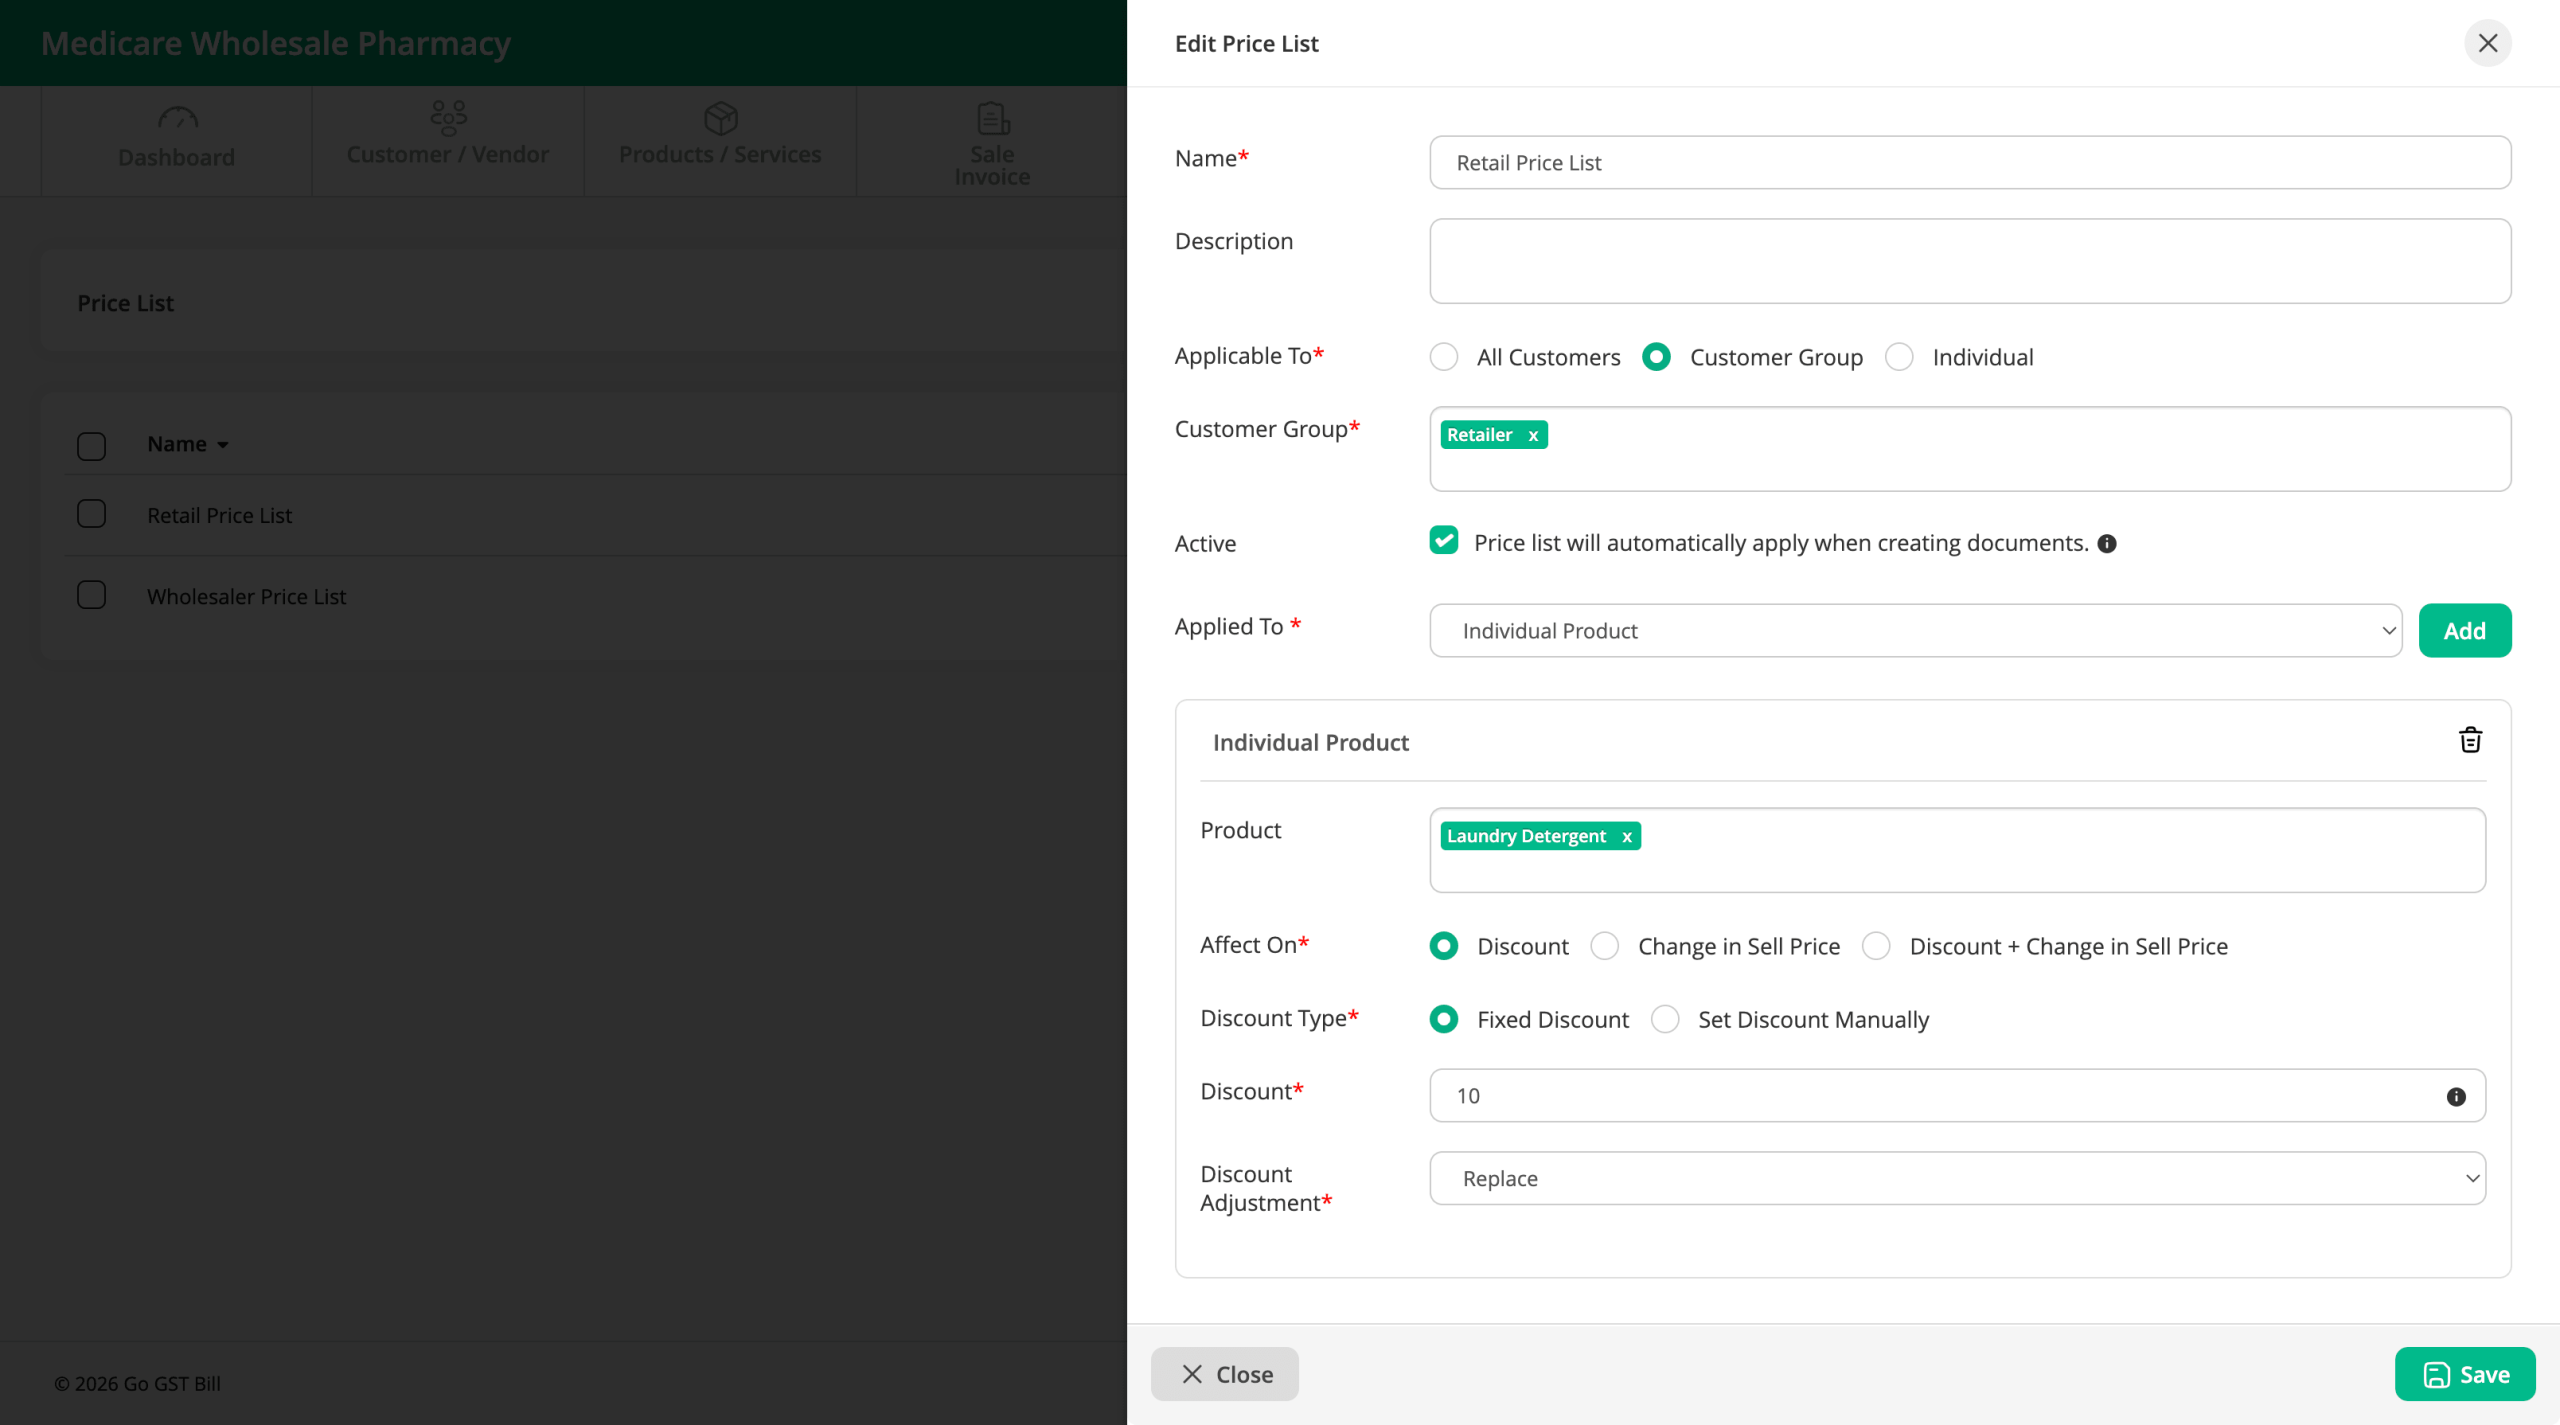
Step 3: Same as step 2 create a price list for Retail customers as per the shown configuration.
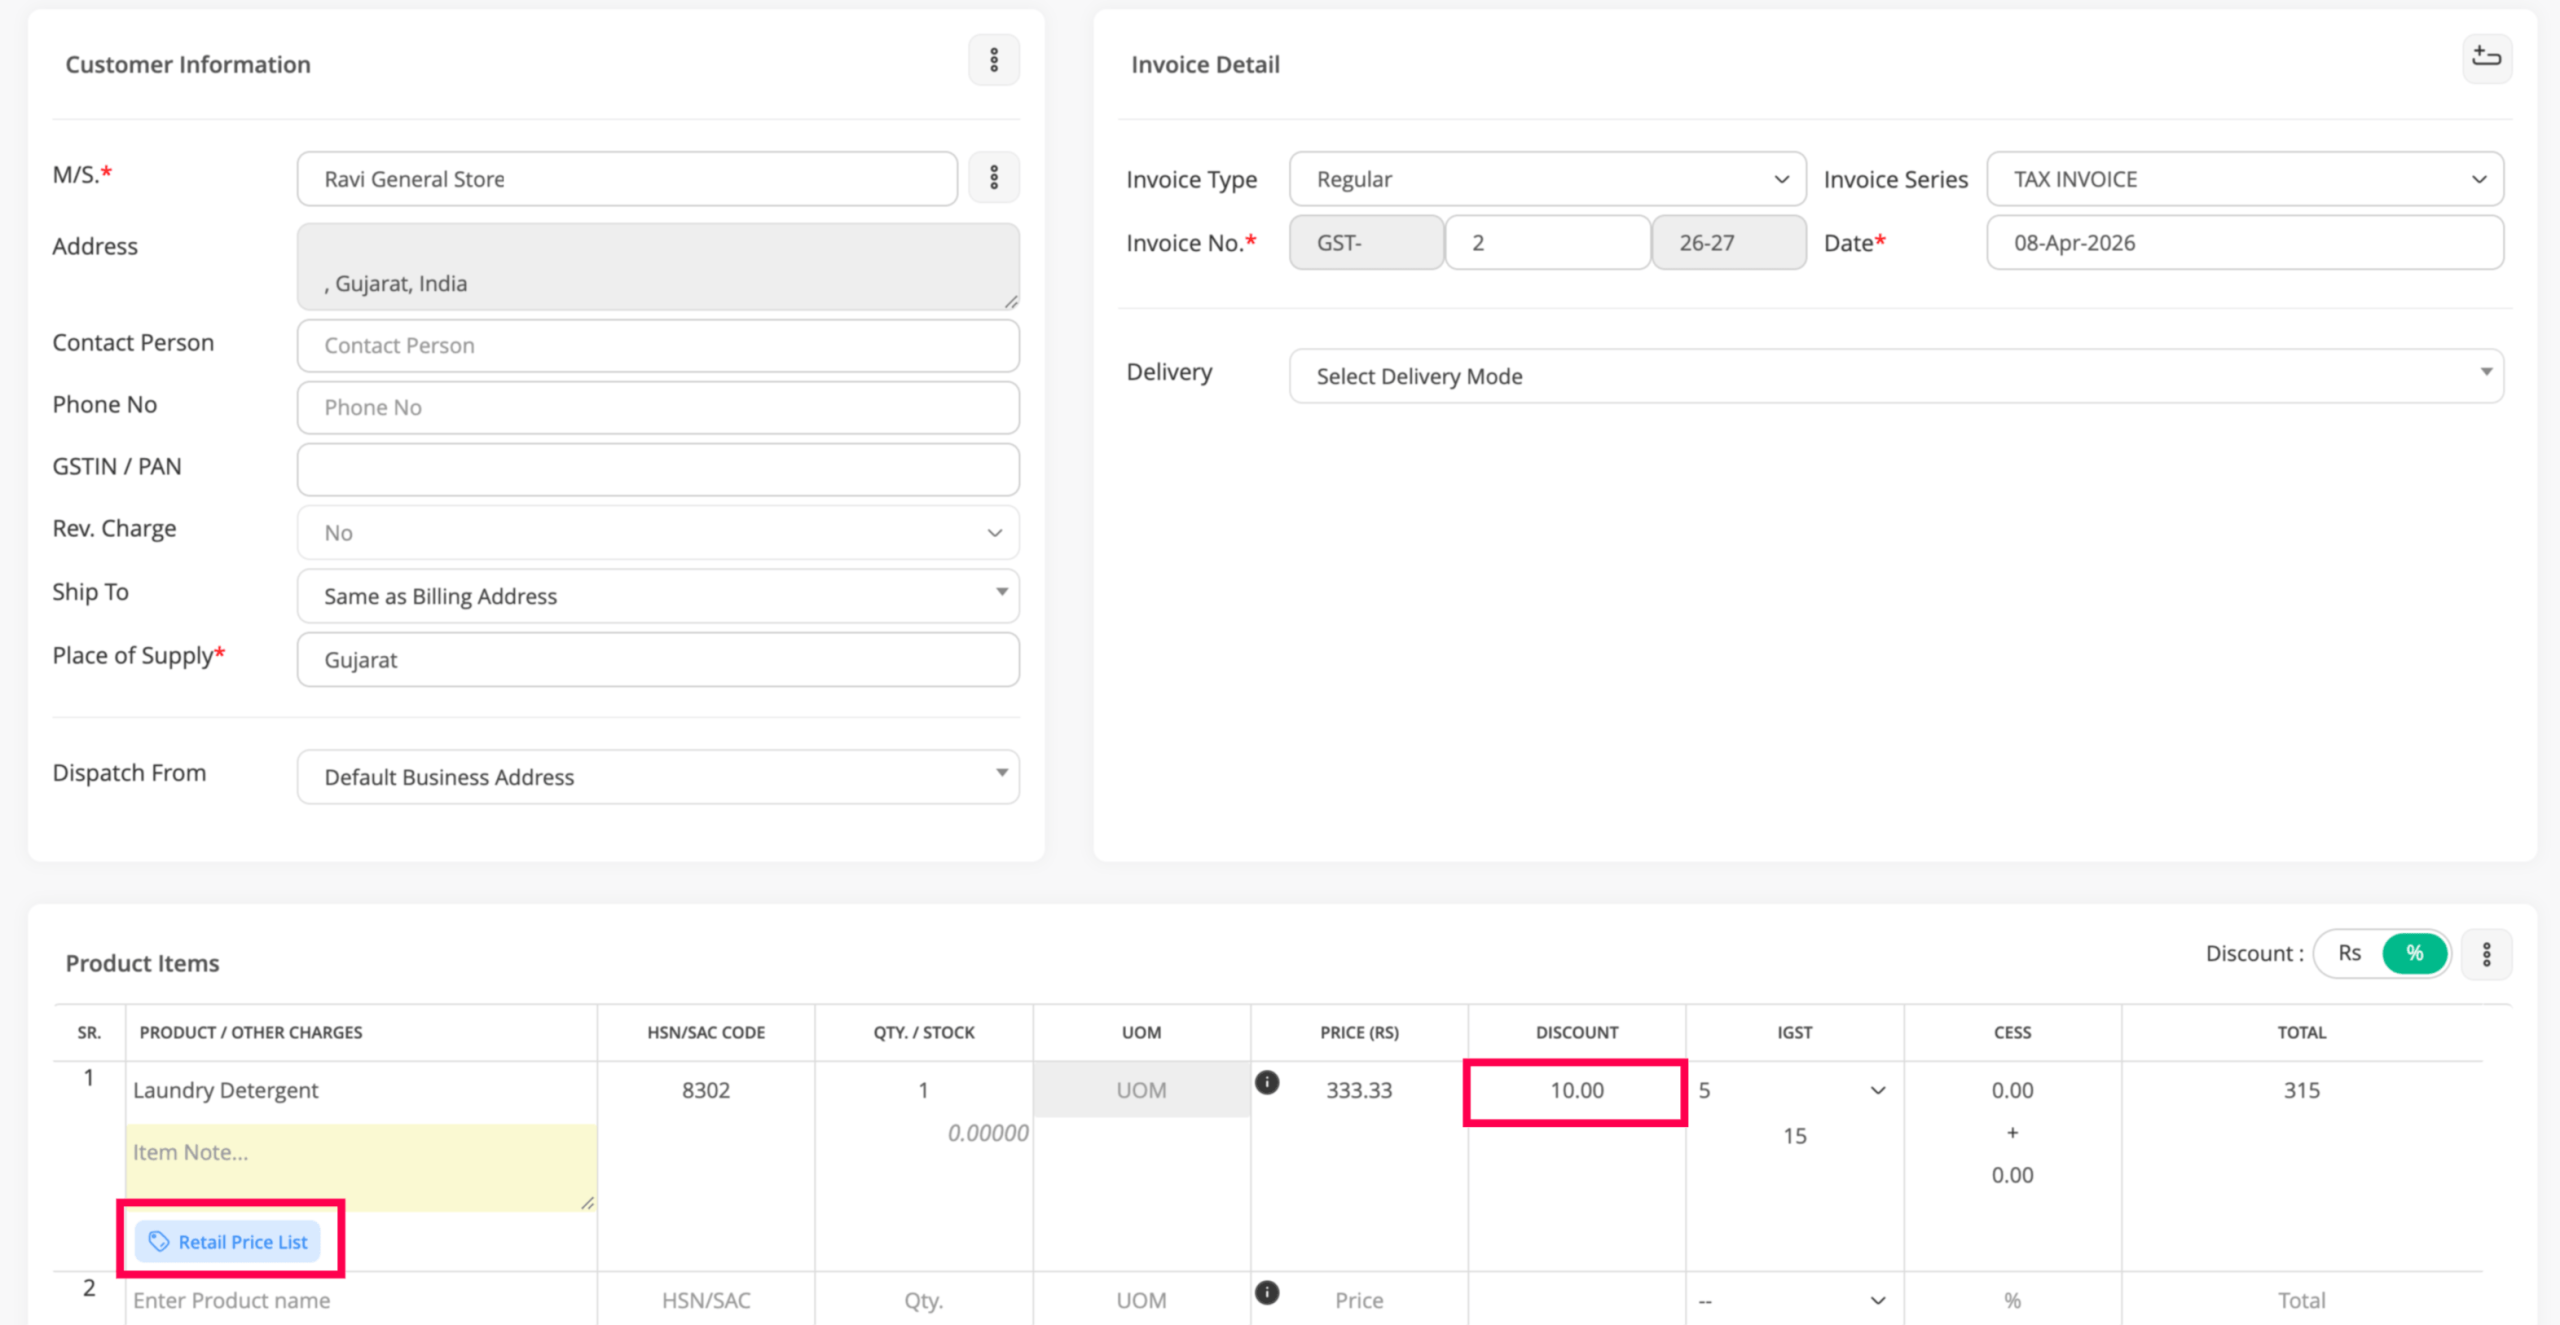
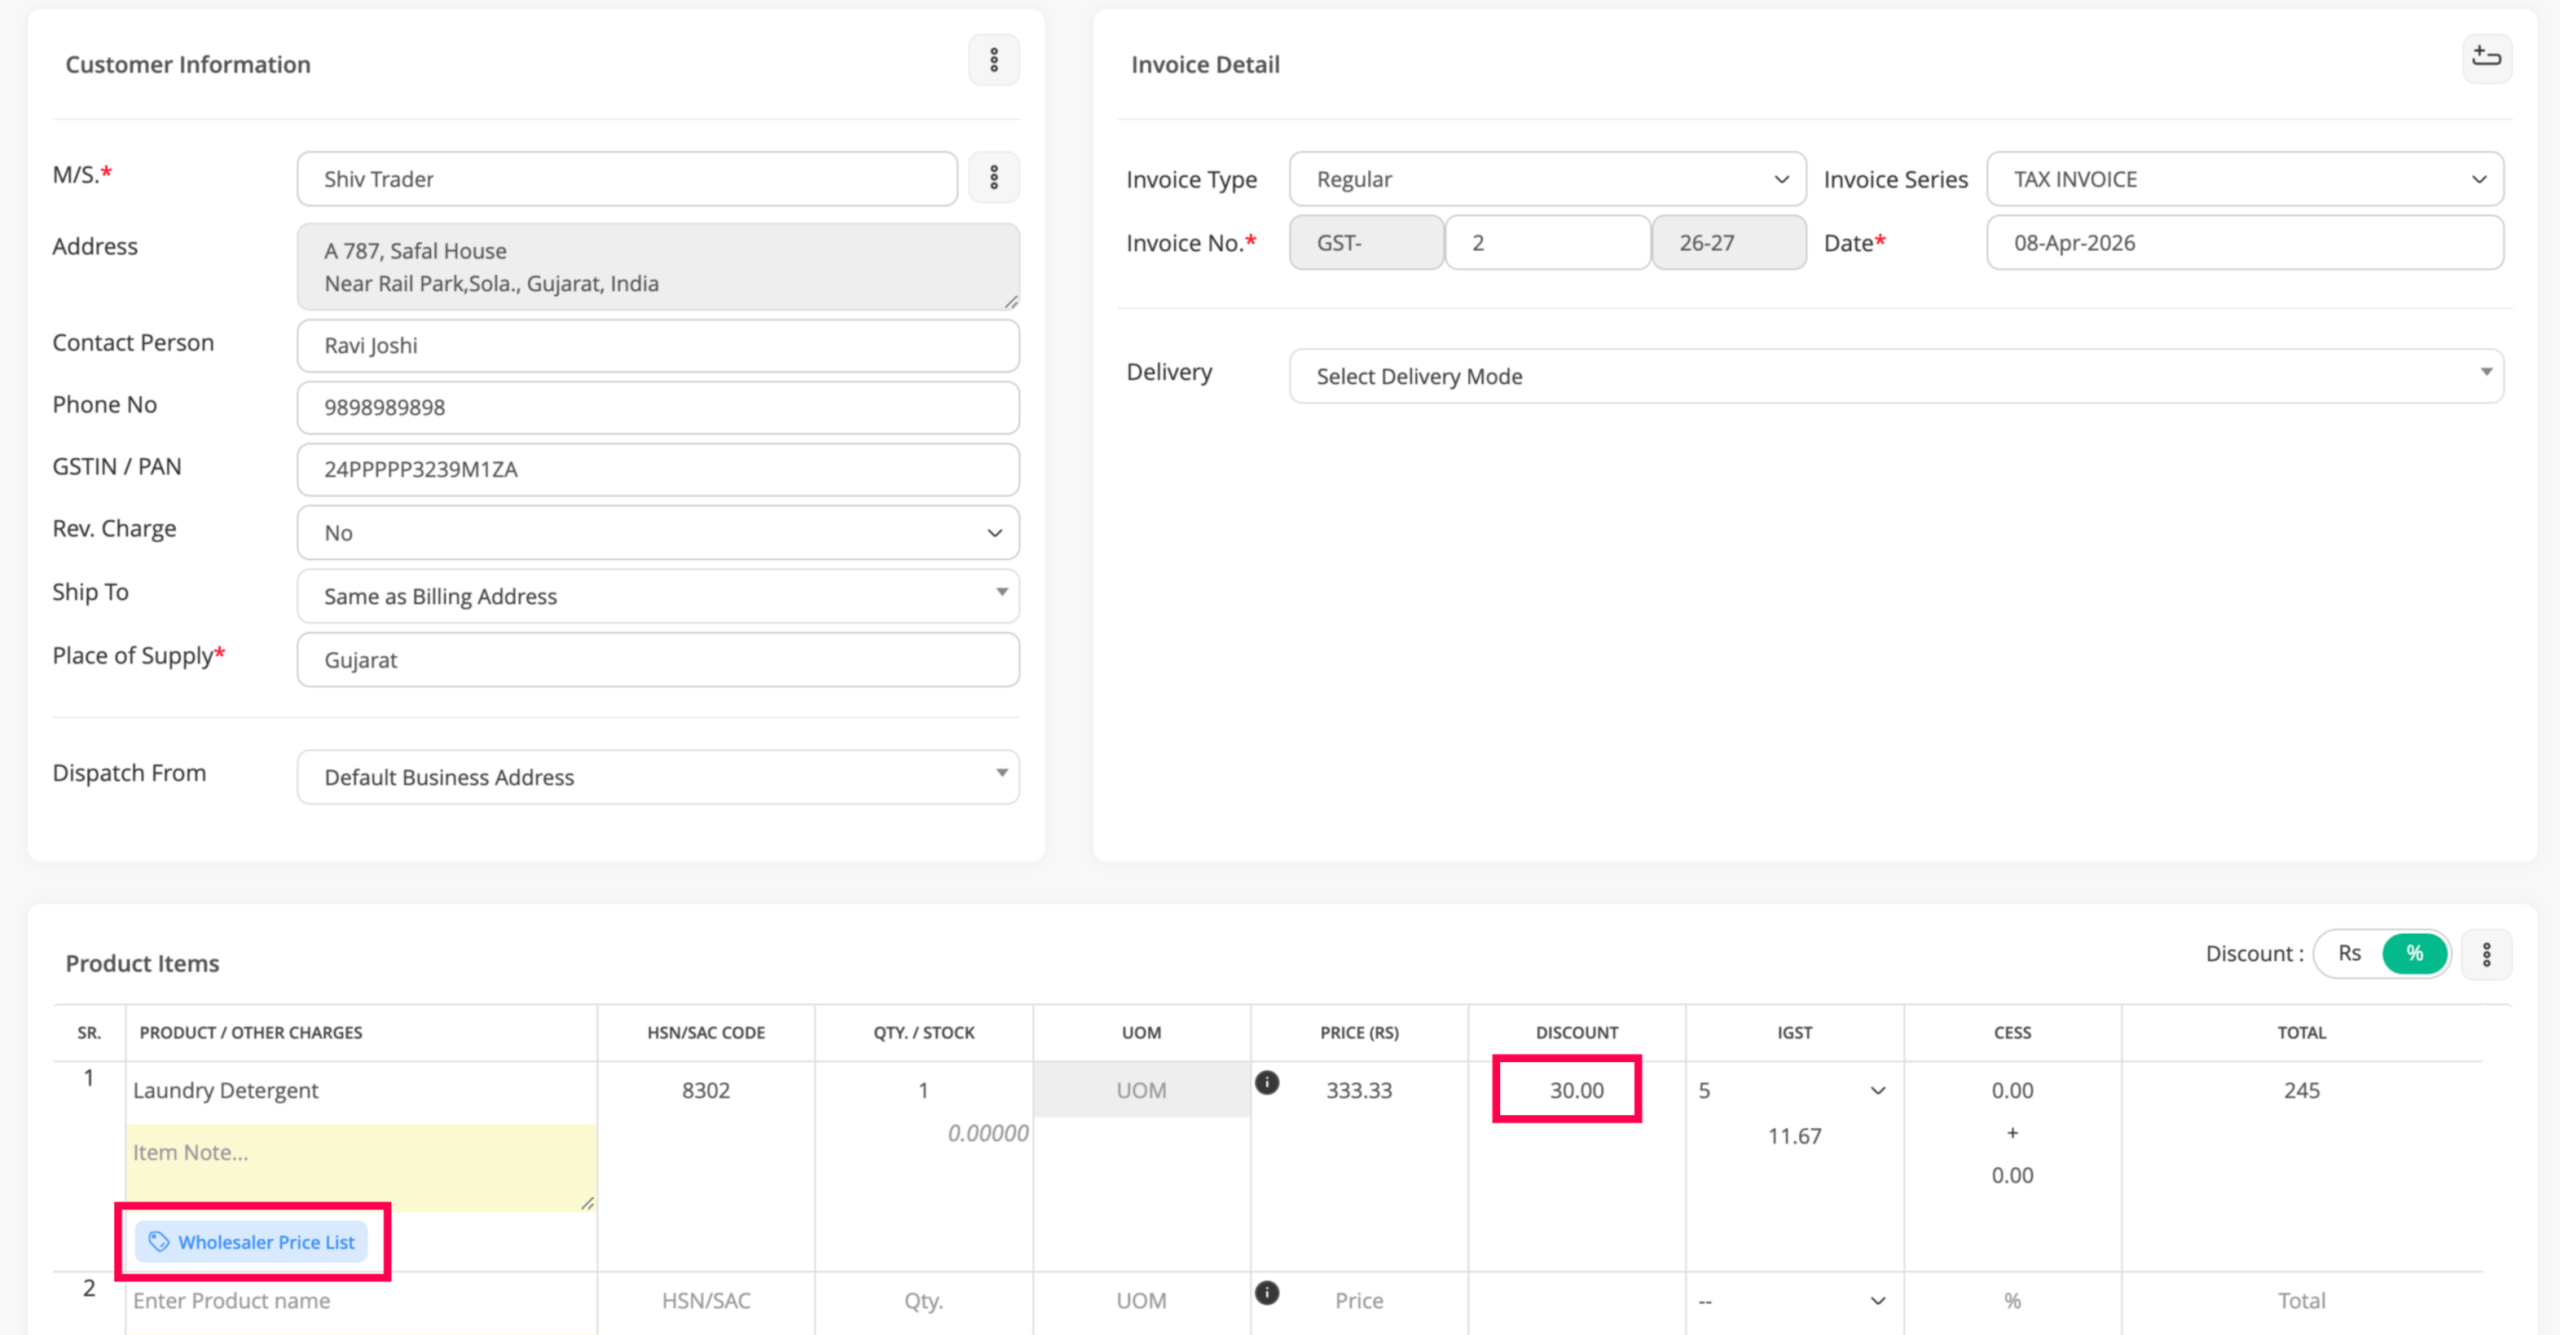
Step 4: Now, create a invoice for Shiv Trader. You will see that the Wholesale price list is automatically applied to the selected product.
If you create an invoice for Ravi General Store, the system will automatically select the Retail price list.