Why should you add a bank entry or import a bank statement?
As a business owner, it’s important to keep a clear record of your incoming and outgoing payments. Adding bank entries or importing your bank statement helps you:
-
Here’s how you can easily add a bank entry or import your statement in Go GST Bill:
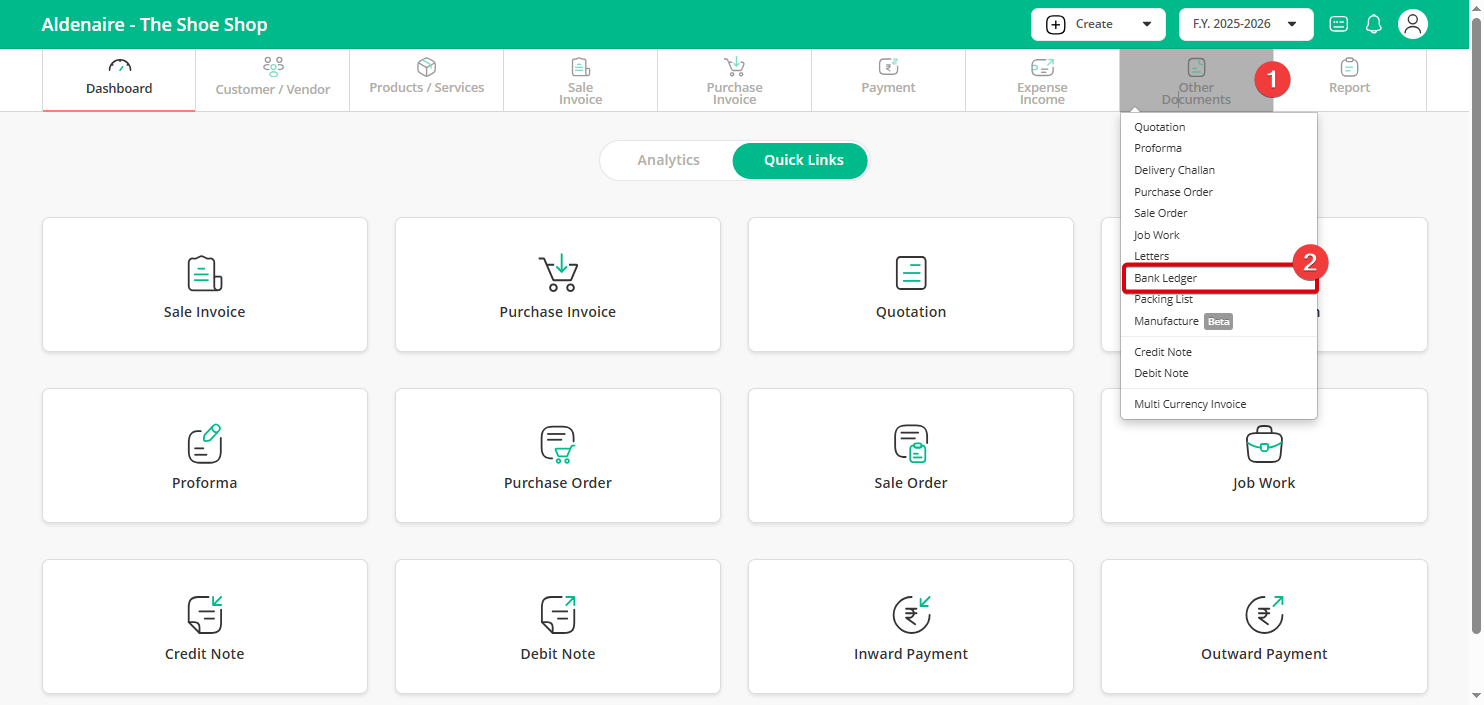
Step 1: From the Dashboard, click on “Other Document”, then select “Bank Ledger”.
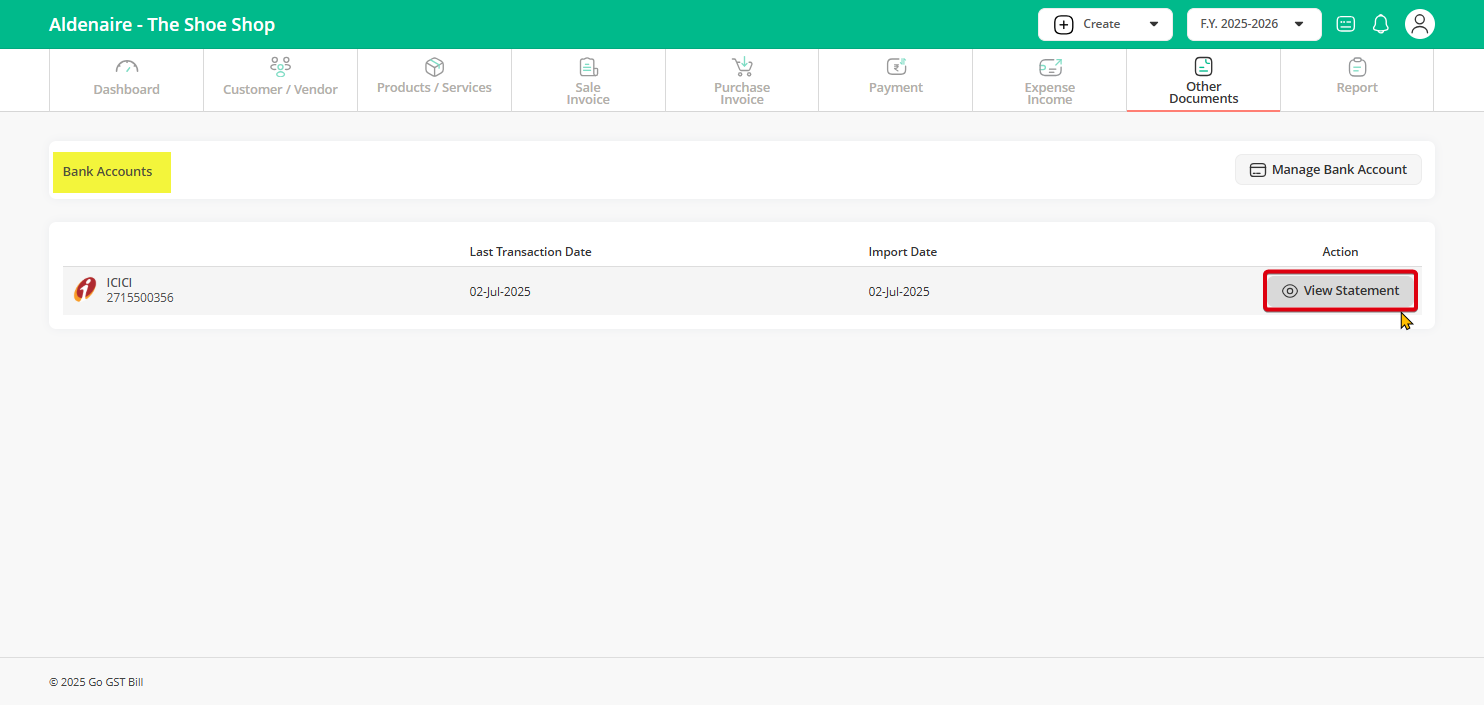
Step 2: You’ll see a list of your saved bank accounts, click “View Statement” next to the account you want to update.
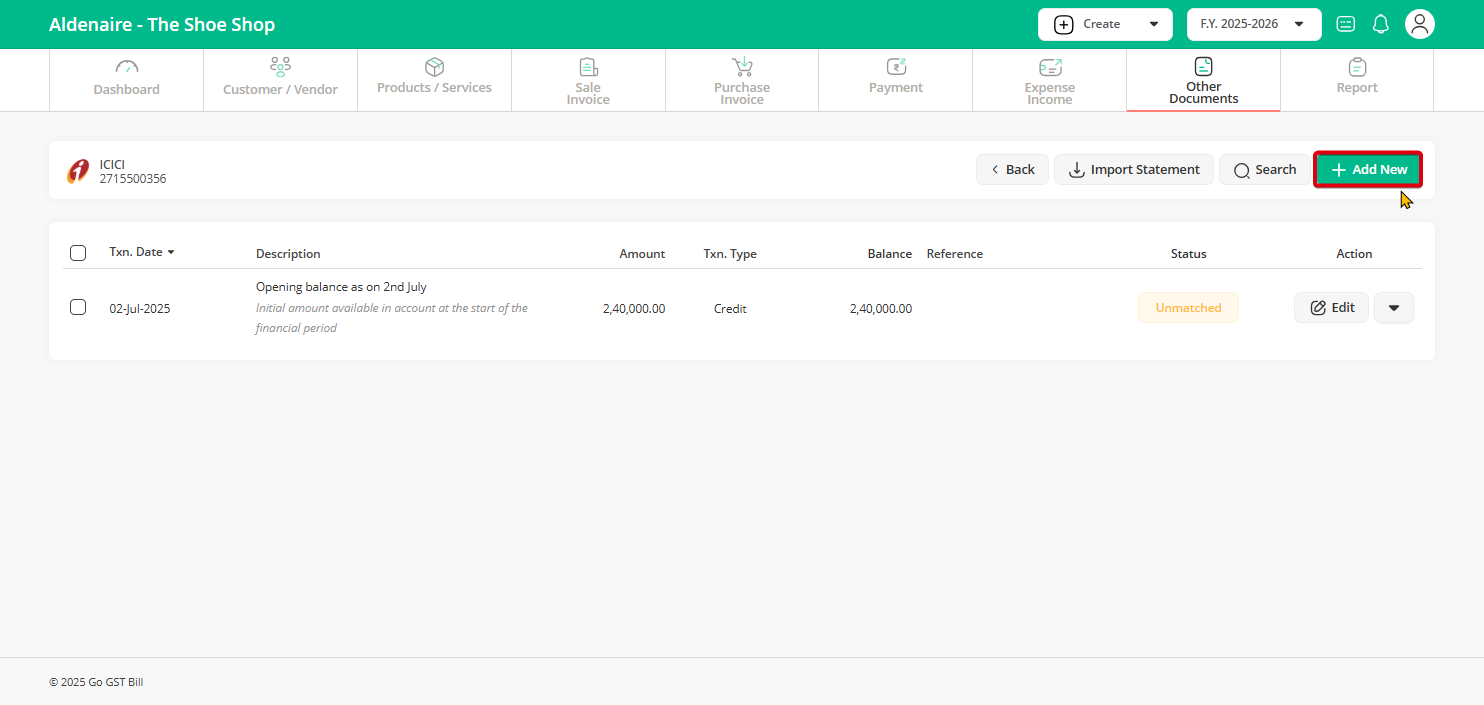
Step 3: Click on the “Add New” button at the top-right of the bank statement page.
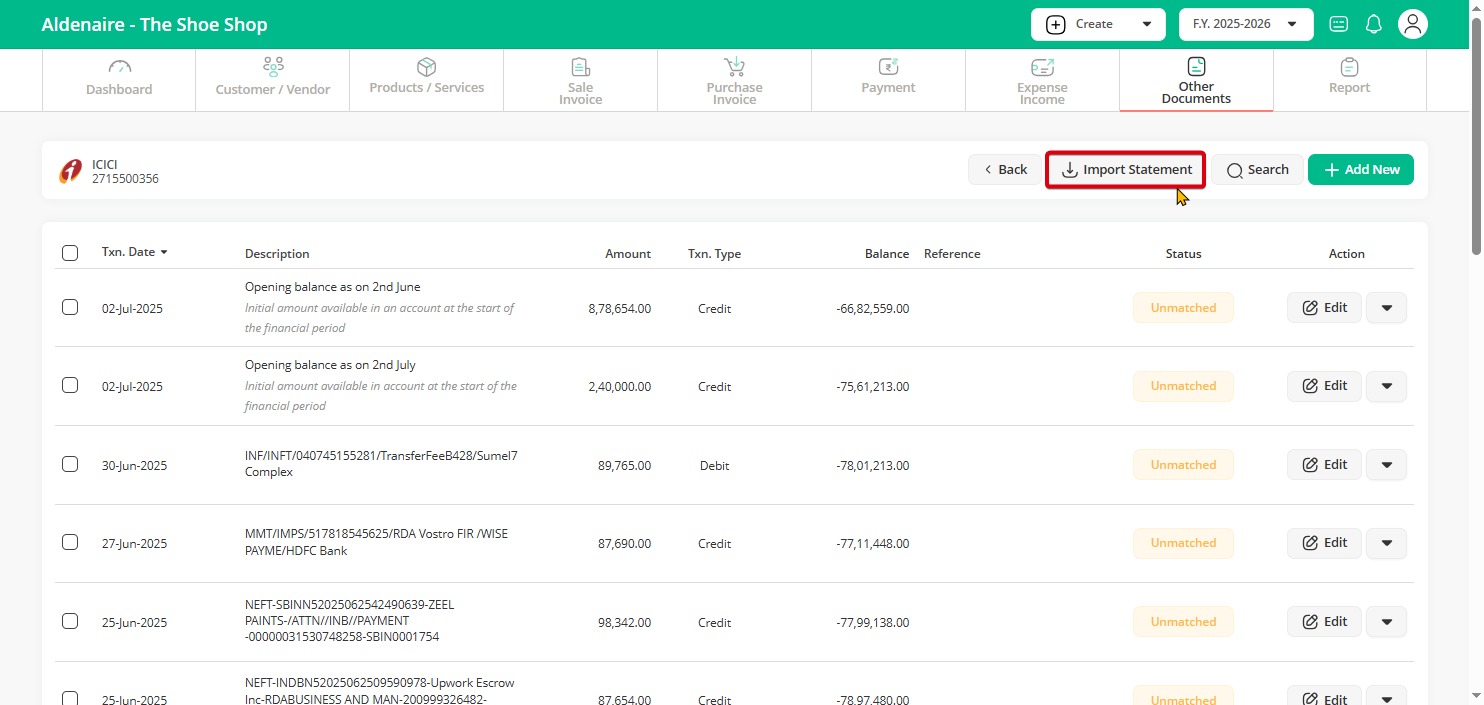
Step 4: Click on “Import Bank Statement” on the right to upload your full statement.
Note: If you want to add an opening balance, please refer to this article.
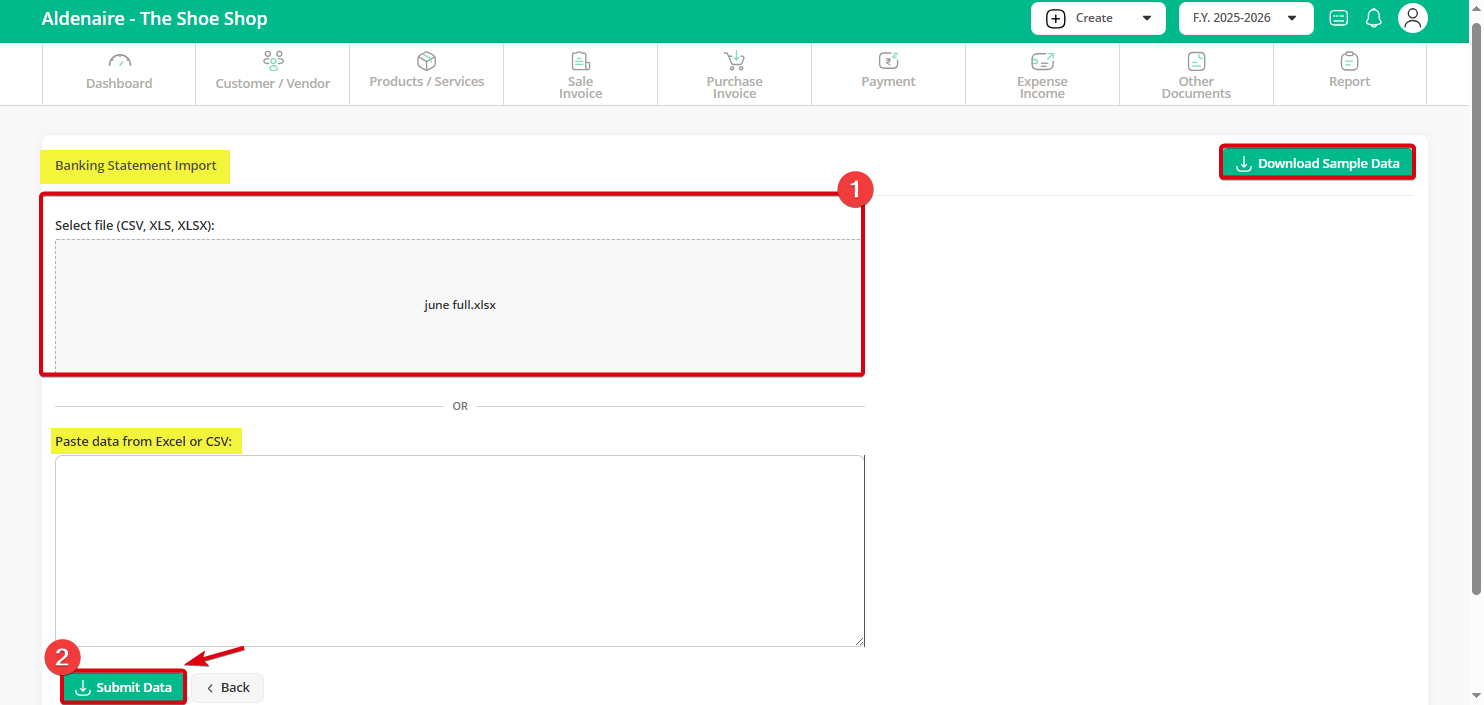
Step 5: This step is just a guide to help you understand how to import your bank statement correctly.
In most cases, you can upload your bank statement directly without any changes.
If you face an error, click on “Sample Data Format” to check the required format and make corrections. Once done upload your file and click “Submit Data” to proceed.
You can upload your statement in two ways:
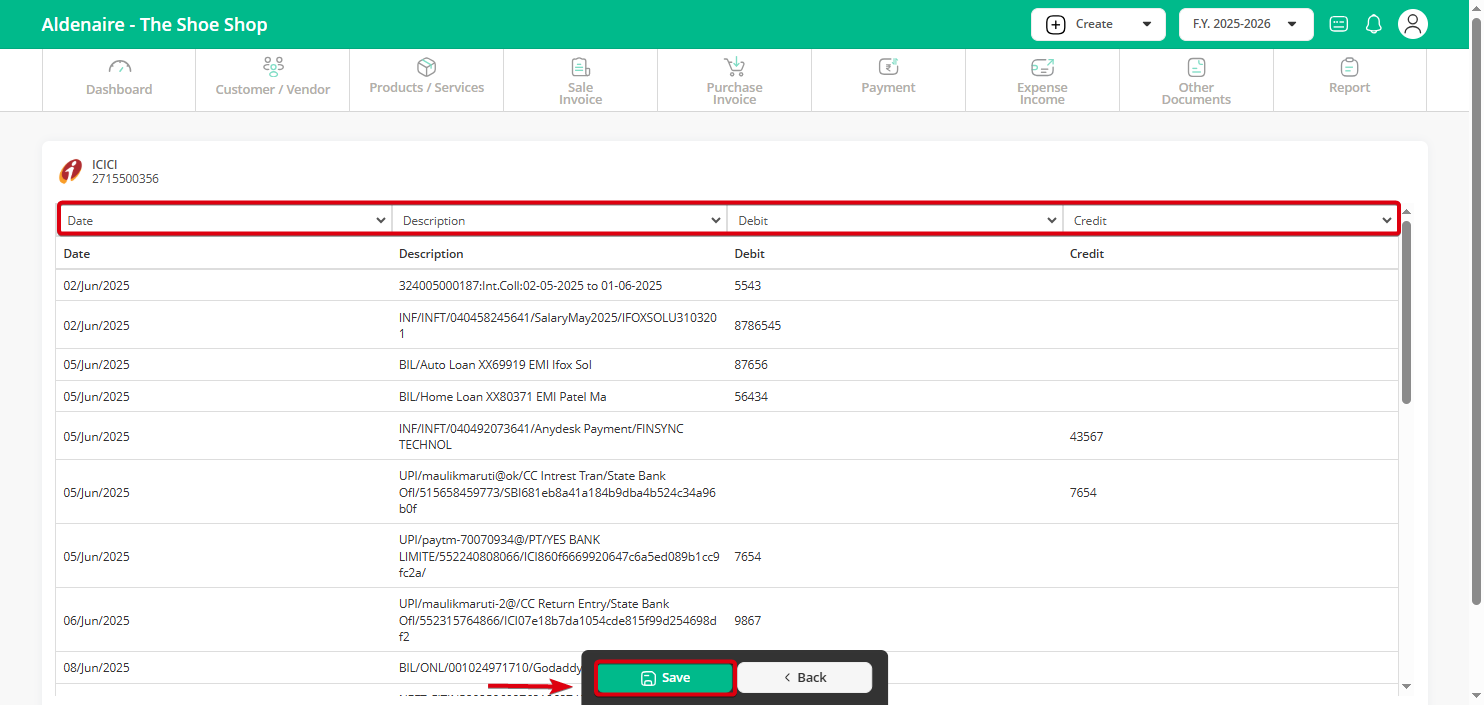
Step 6: You can now see the imported bank statement now click “Save” to confirm and move to the next step.
Note: If your uploaded file contains multiple columns, you must correctly map each column to the appropriate header.
Please ensure that you select the Transaction Date, Description, Credit, and Debit columns correctly. You may skip the other columns.
Step 7: After clicking “Save”, your bank statement will be visible. If a transaction matches by date and amount, it will show as “Auto Matched.”
-
If it’s unmatched click “Unmatched” to manually link it to a payment, expense, or income.
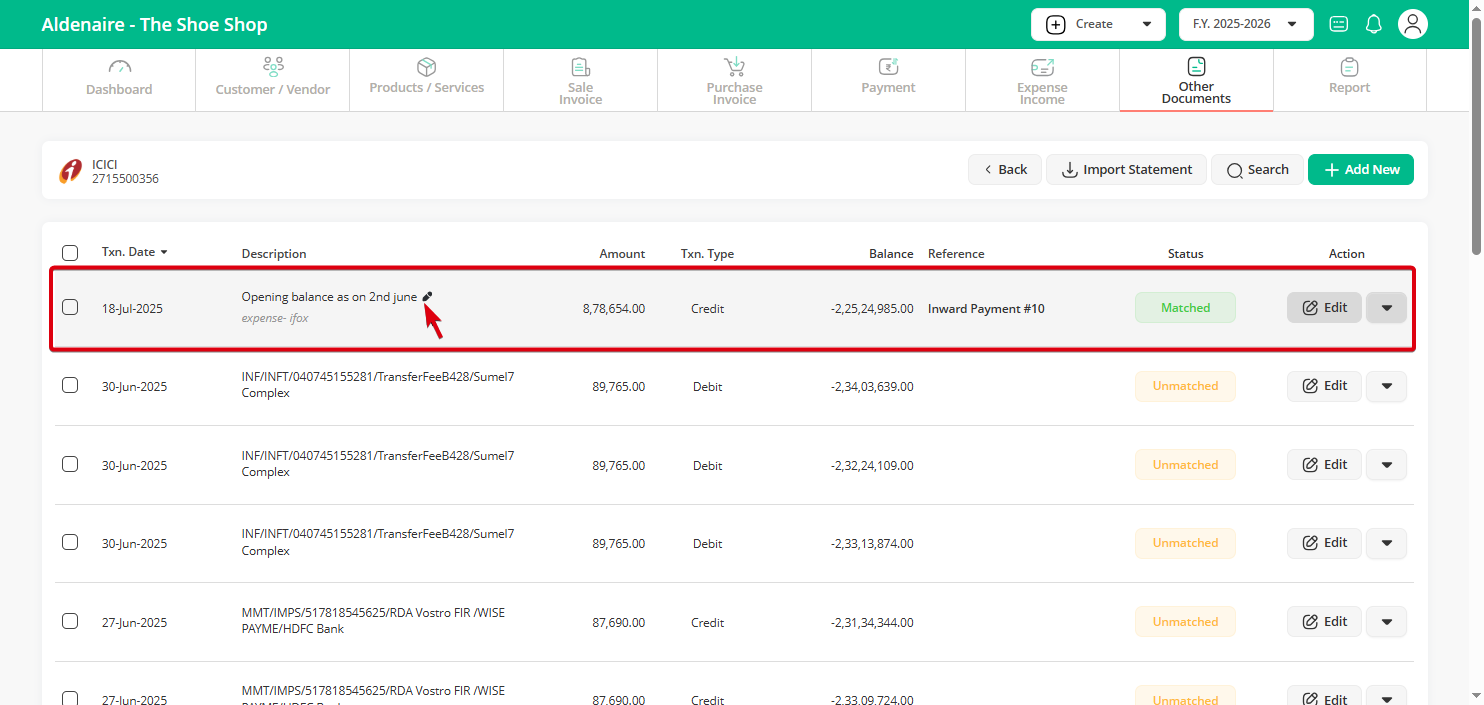
Note: You can also add a note for any transaction as a remark for future reference.