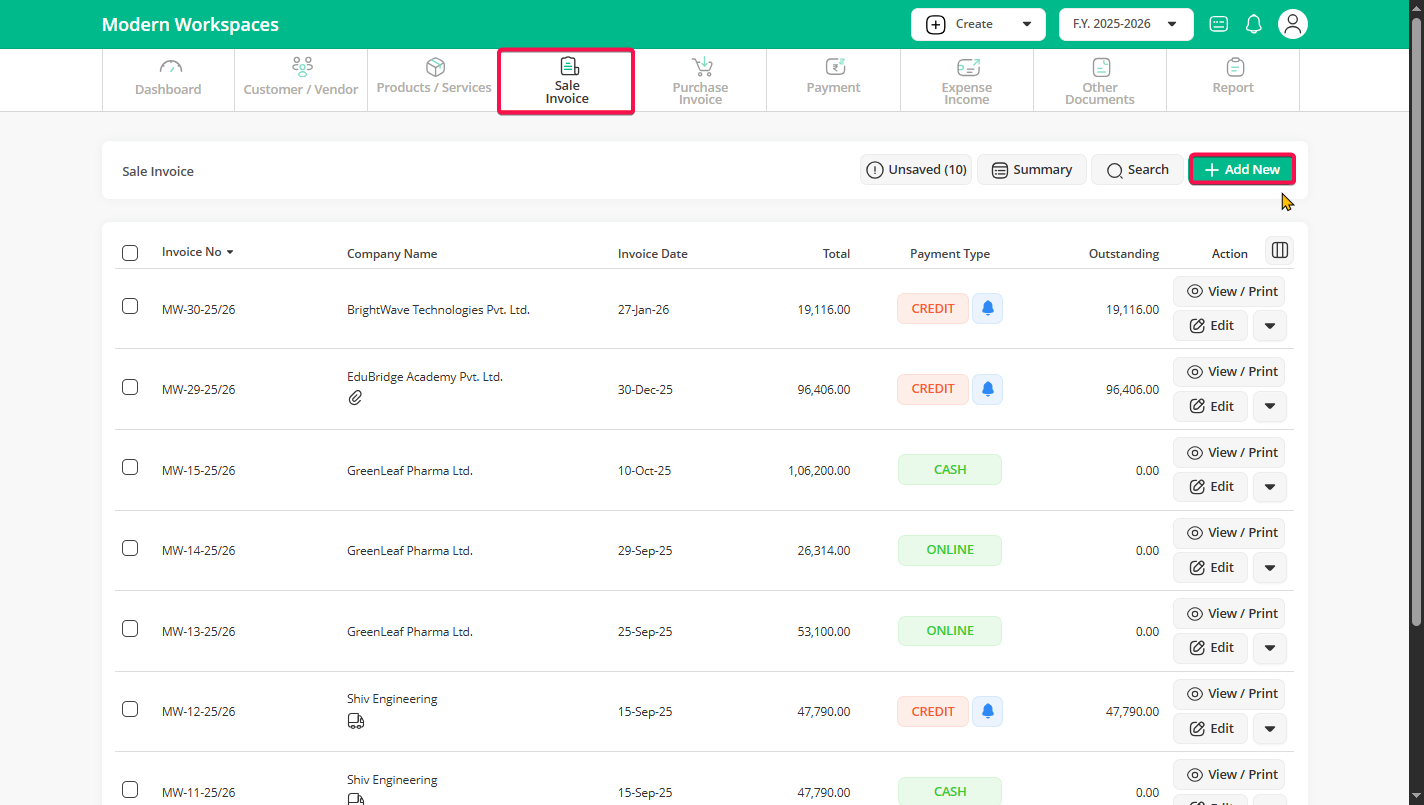
Step 1 : Log in to your Go GST Bill account. From the dashboard, click on the Sales invoice menu and then click on the “Add new” button to start creating a sale invoice.
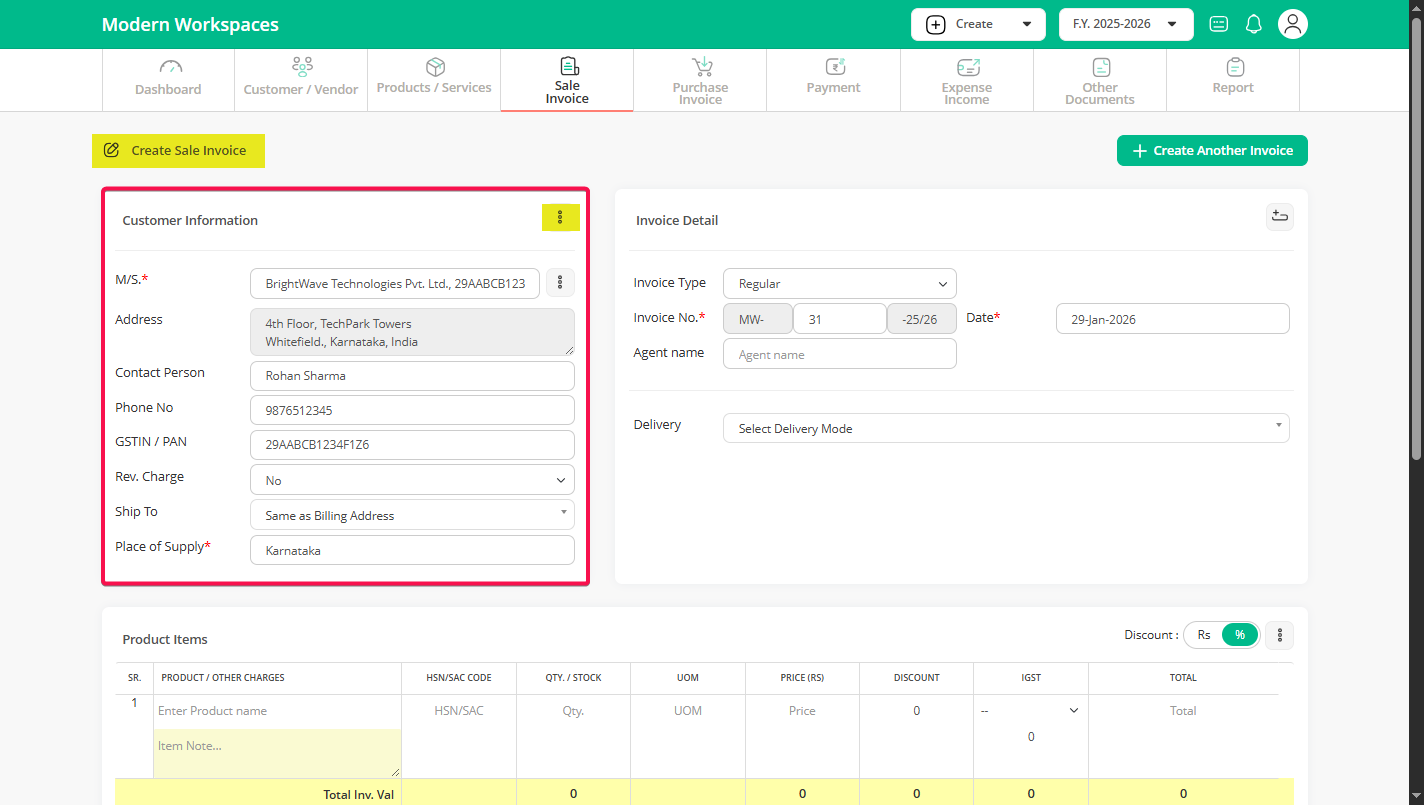
Step 2 : Under the Customer Information section, select a customer from the list. If the customer is not available, click on the three DOTS on the right side and choose “Add Customer” to add a new customer.
Note: If required, click on the “three dots” to add a “Shipping Address” or “Dispatch From Address”. This option is useful when the delivery location or dispatch location is different from the customer’s main address
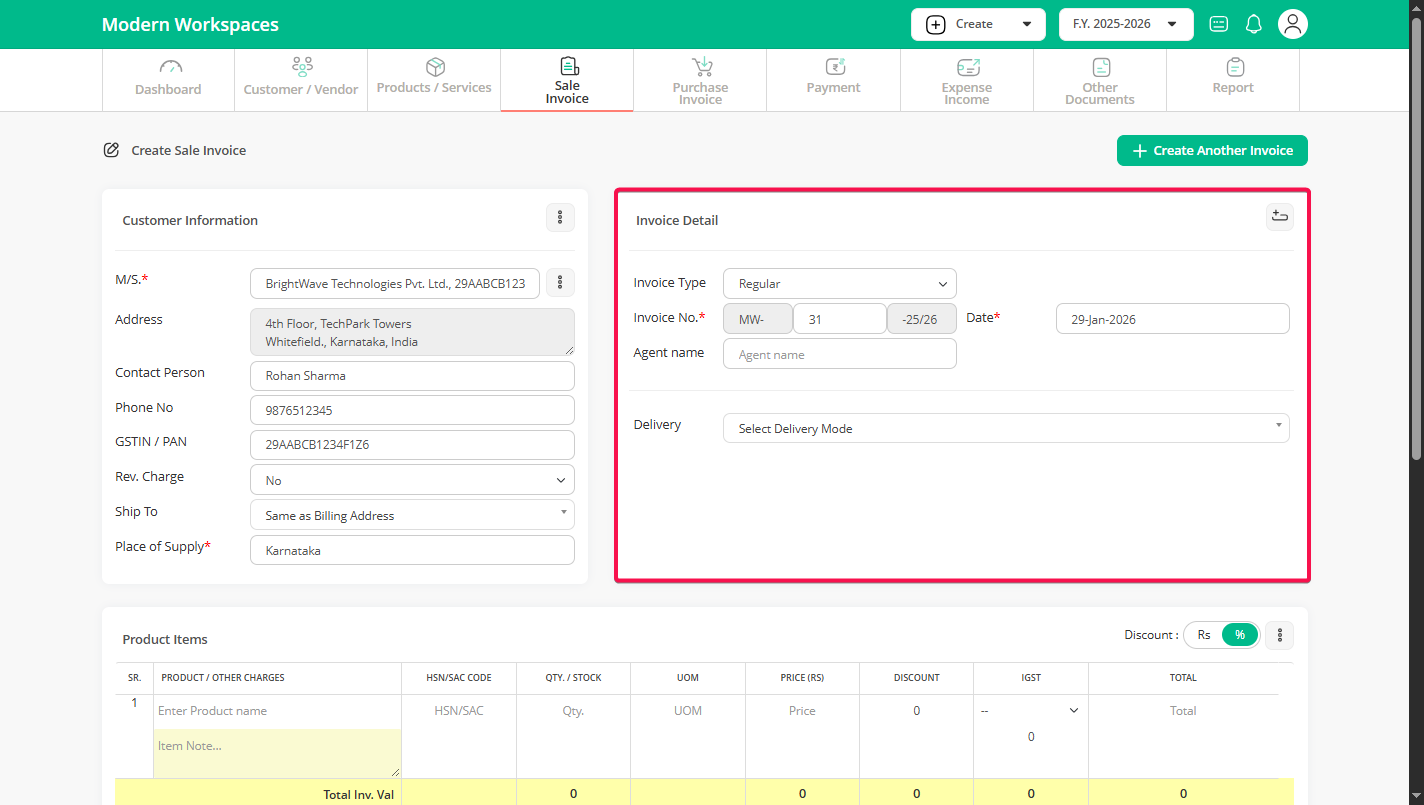
Step 3 : Under the Invoice details section, the invoice number and date are added automatically, but you can edit them if needed.
– On the right side, click on the custom field icon to add extra details specific to your business. You can create fields like Challan no, Agent name, Delivery date, or any other information you want to show on the invoice.
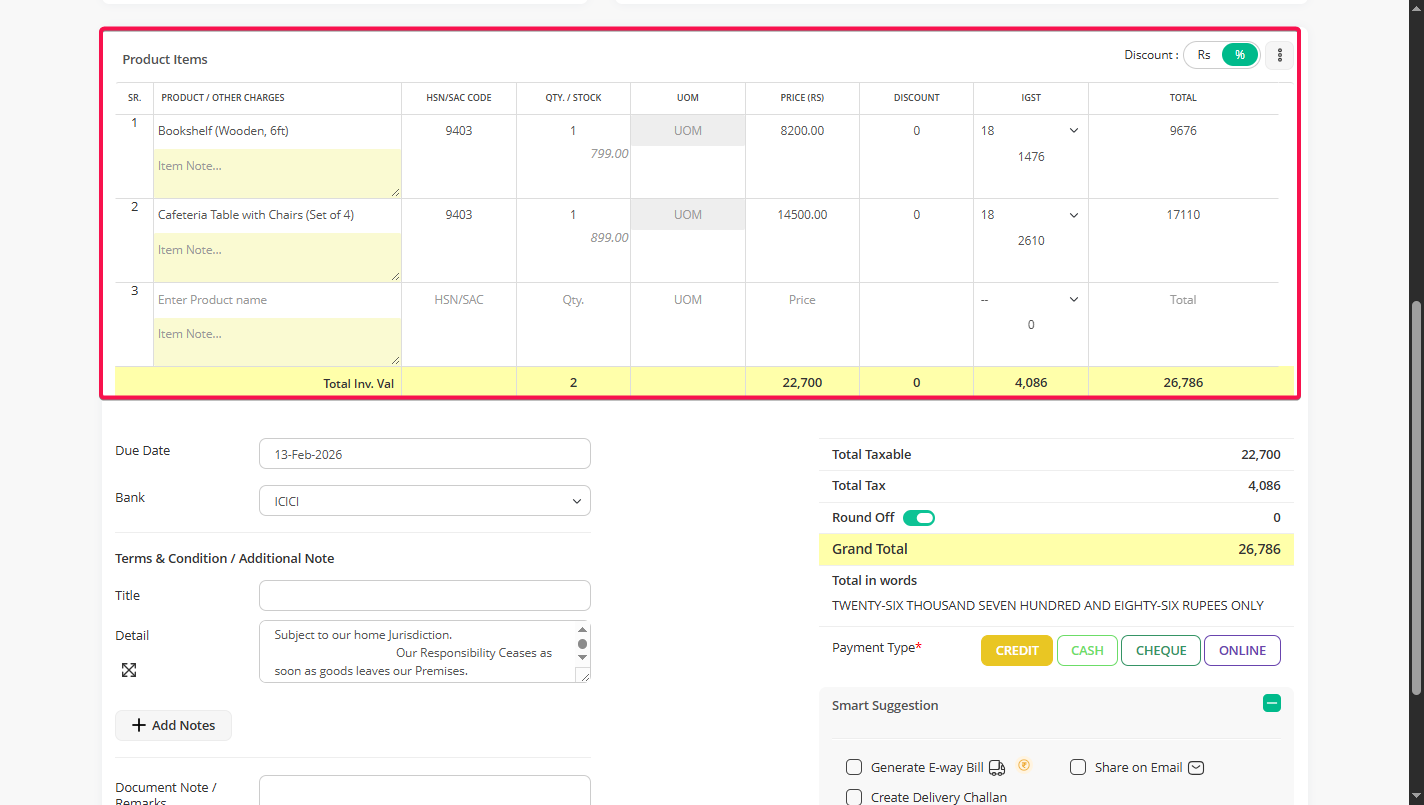
Step 4 : Add products from the list. Details like HSN, quantity, UOM, price, and GST will fill in automatically, so you don’t have to enter everything again. You can still edit them if needed.
– If you don’t find the product in the list, just click on the three dots on the right side and select “Add product”. You can also type the product name directly, and it will get saved in your main product list for future use.
Step 5 : On your left side—fill in the details:
You can choose when your client should pay to keep your cash flow on track. You can also pick the account where the payment will be received.
The terms are already set by default. If you want to tweak them for this invoice, you can do it here.
Add specific terms for this invoice, like payment instructions, delivery timelines, or any special conditions agreed with your client. This helps set clear expectations.
Use this section for your internal reminders or notes. These won’t appear on the invoice, so it’s safe for internal tracking.
On your right side – review & finalize:
After checking the total amount, use the round off option to adjust the final invoice value if needed.
Choose the payment type — Credit, Cash, Cheque, or Online — as per the transaction.
You can generate an e-way bill, share the invoice via email, or create a delivery challan if required.
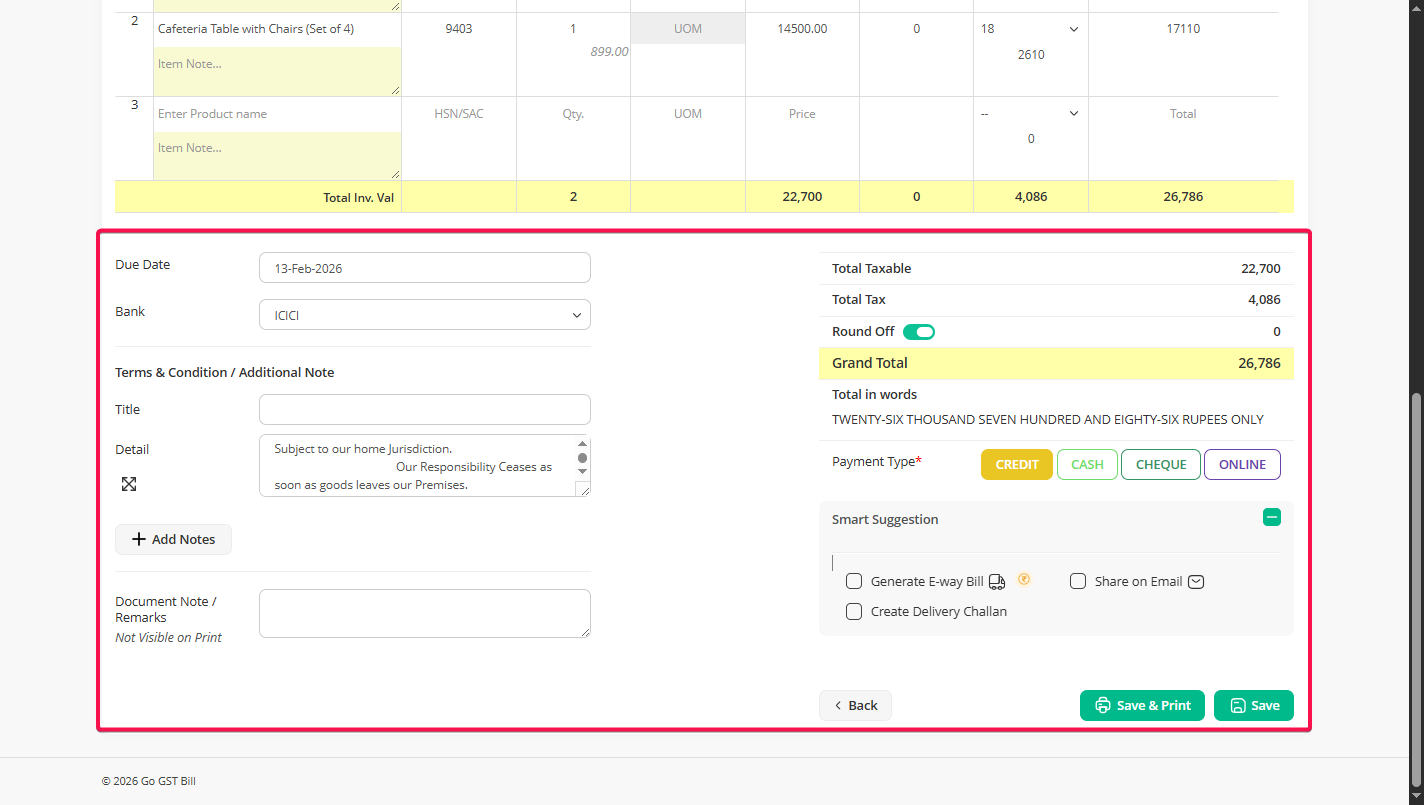
After reviewing all the details, click “Save” or “Save & print” to complete and generate the invoice.